

Overview:
You, the detective, have arrived in a town besieged by wolves... or is
it a werewolf? You need to find out the truth, before it's too late for
the citizens.
Hints: These are unlimited, but must refill.
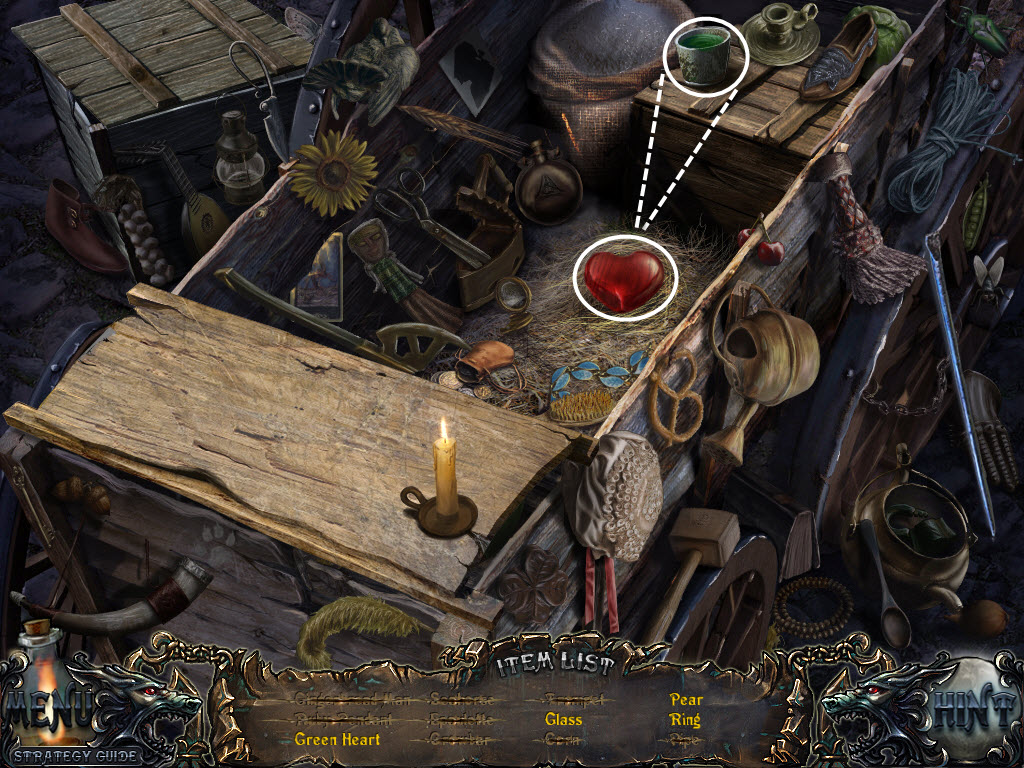
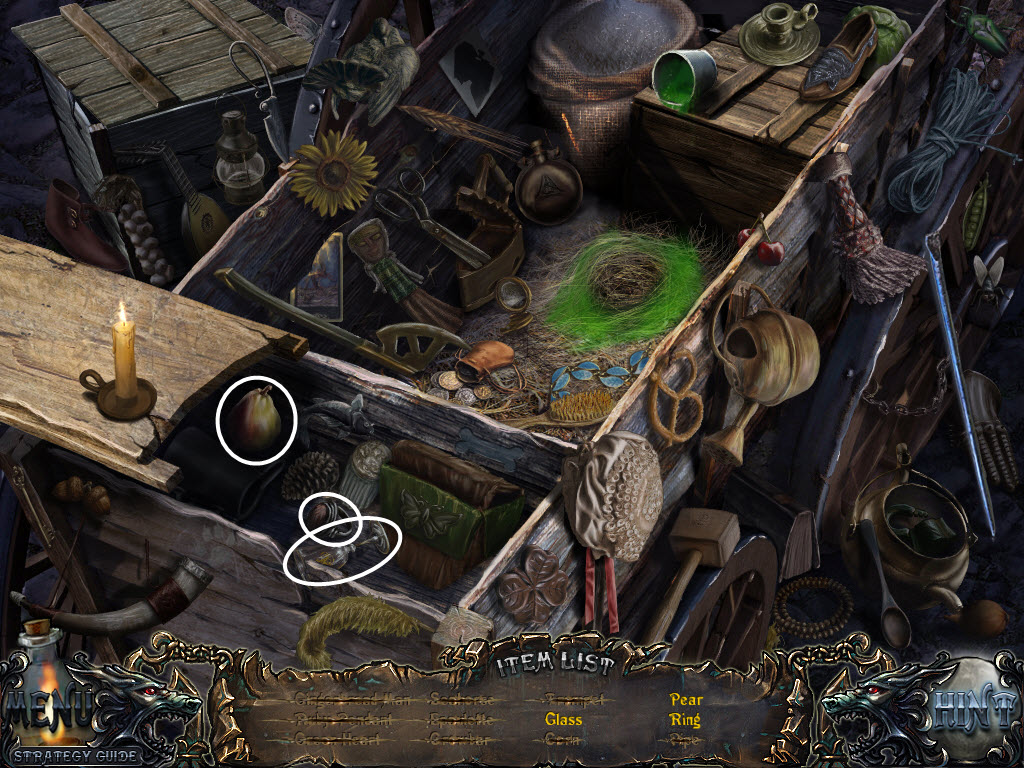
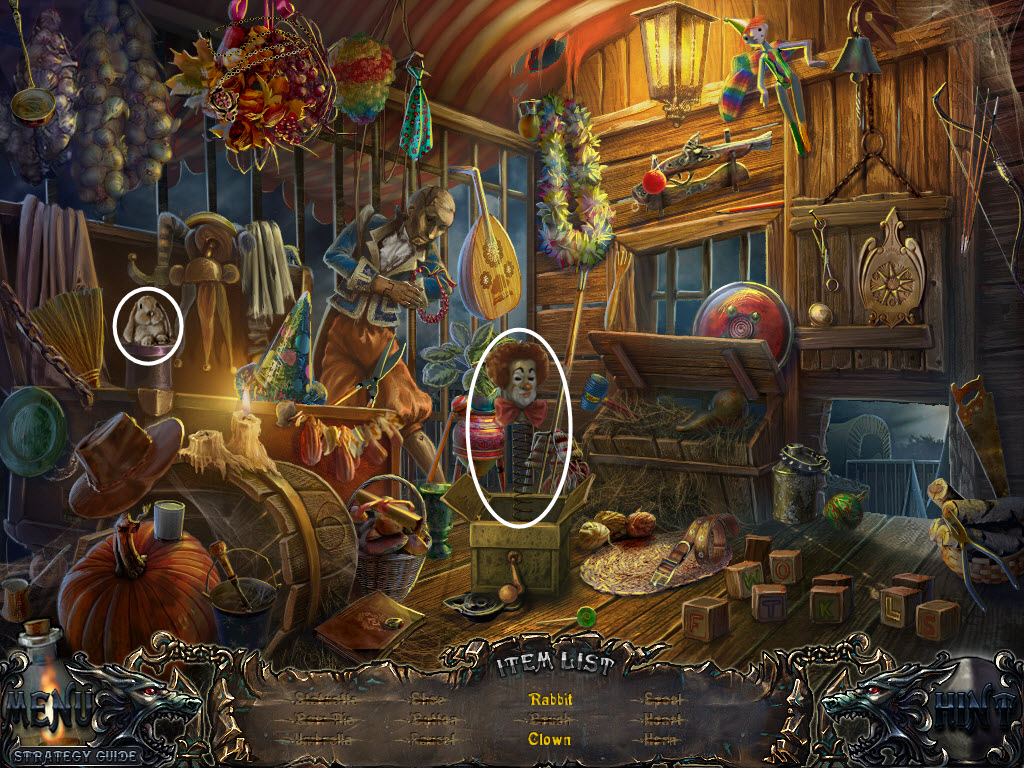
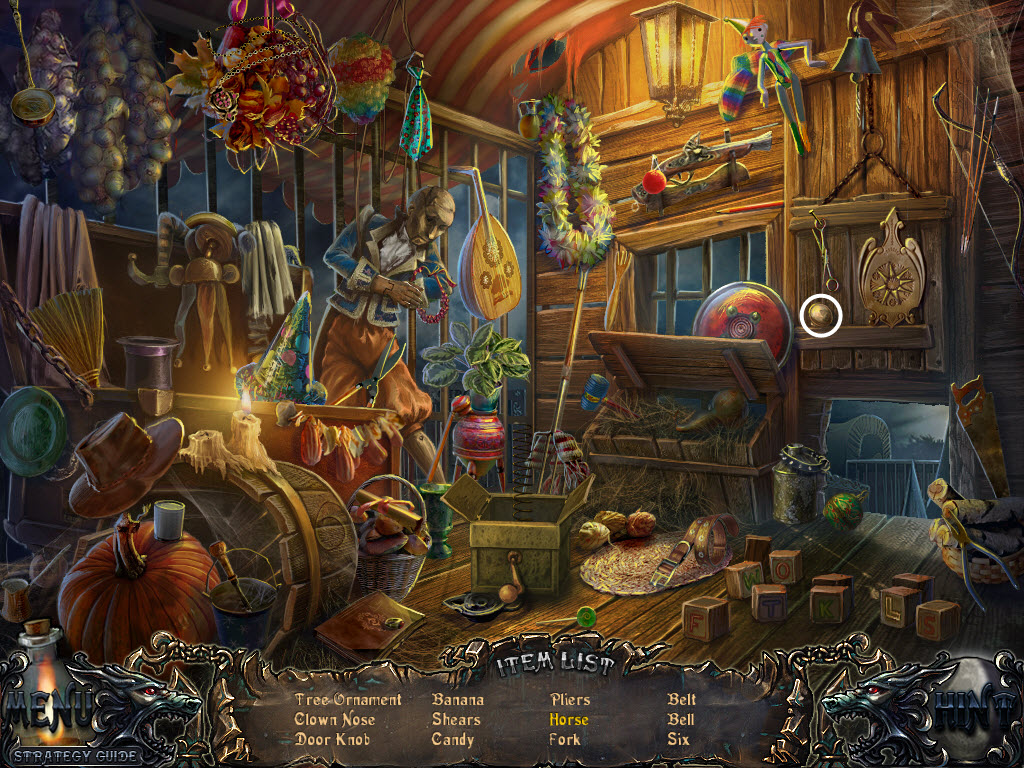
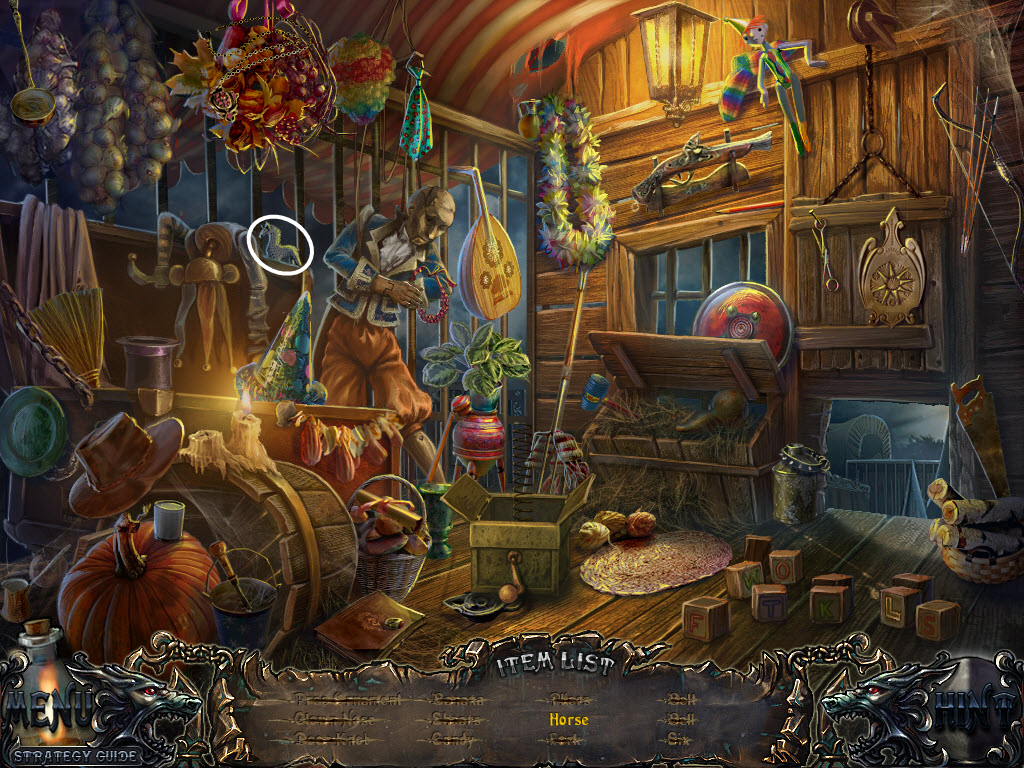
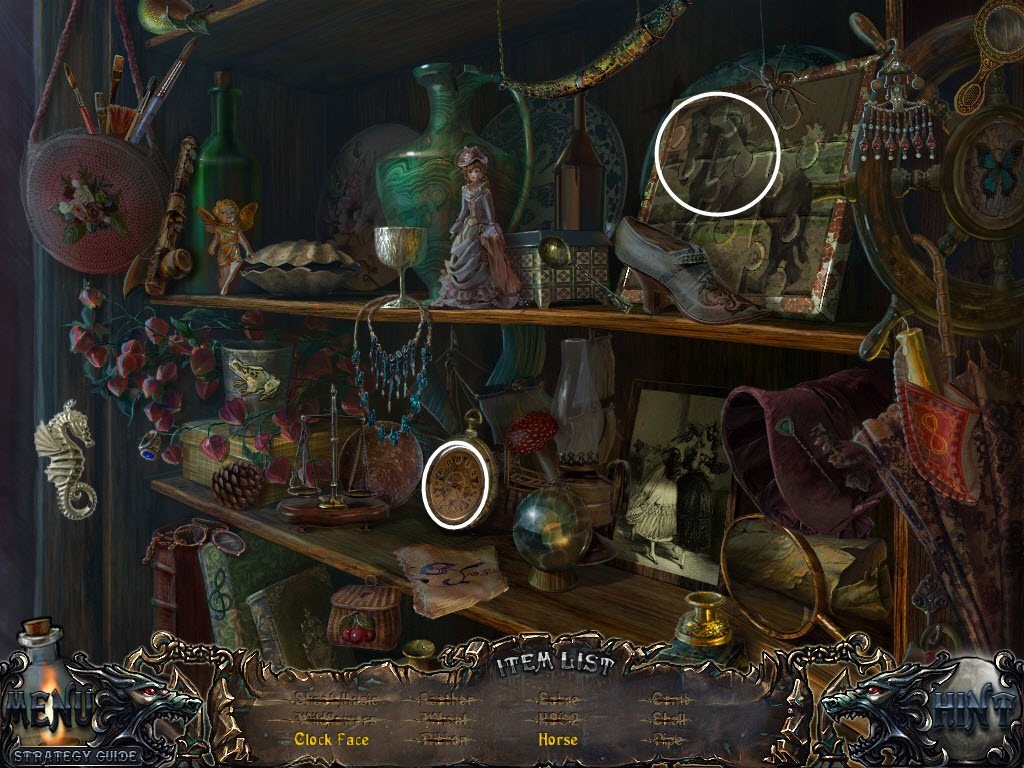
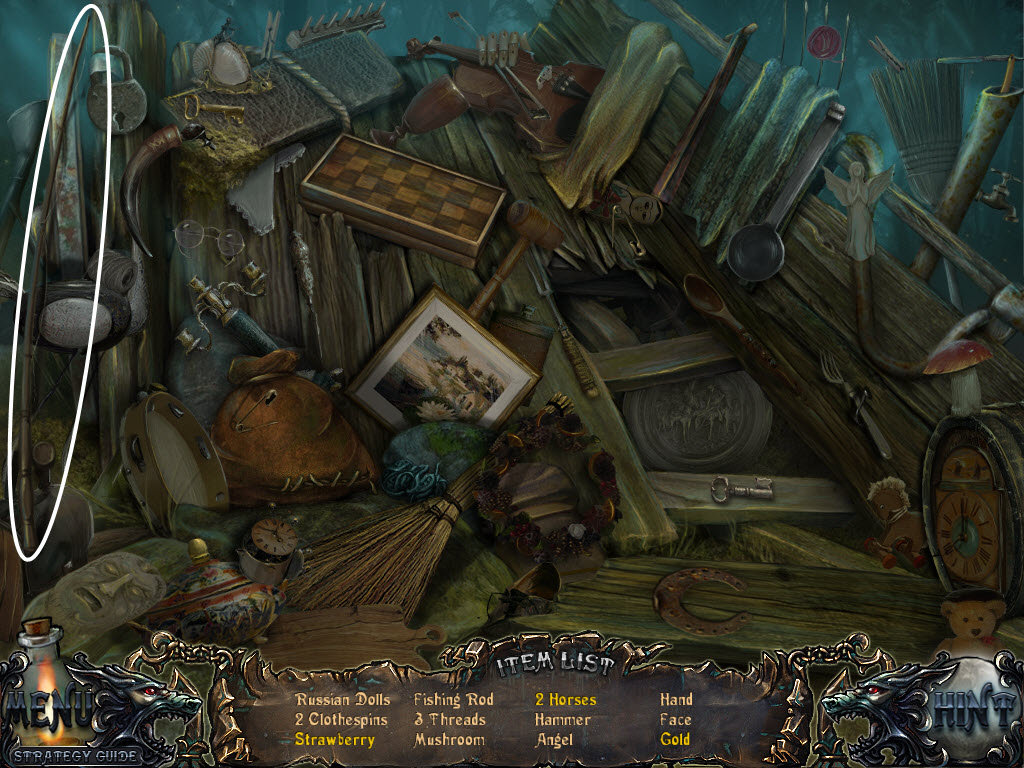
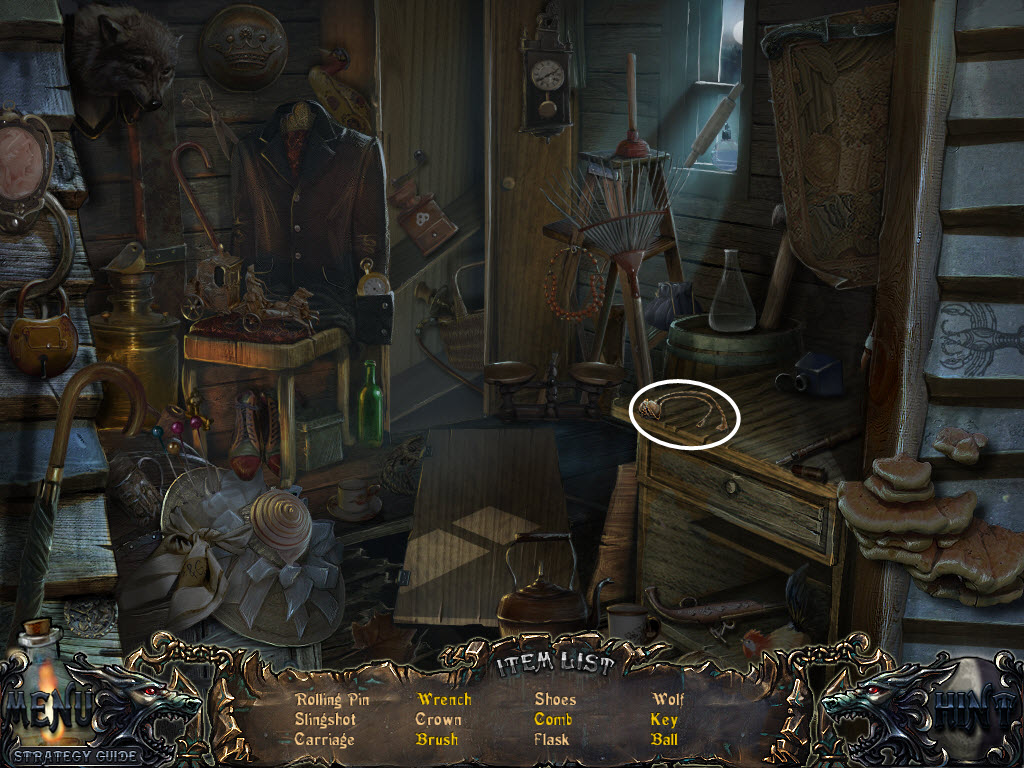
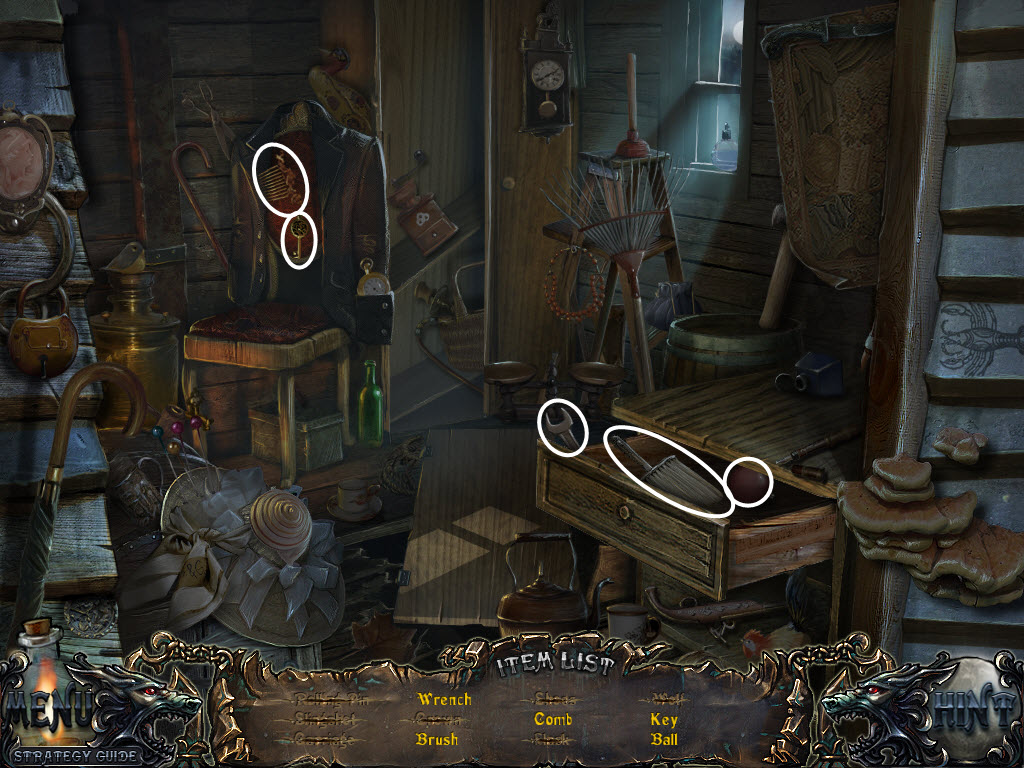
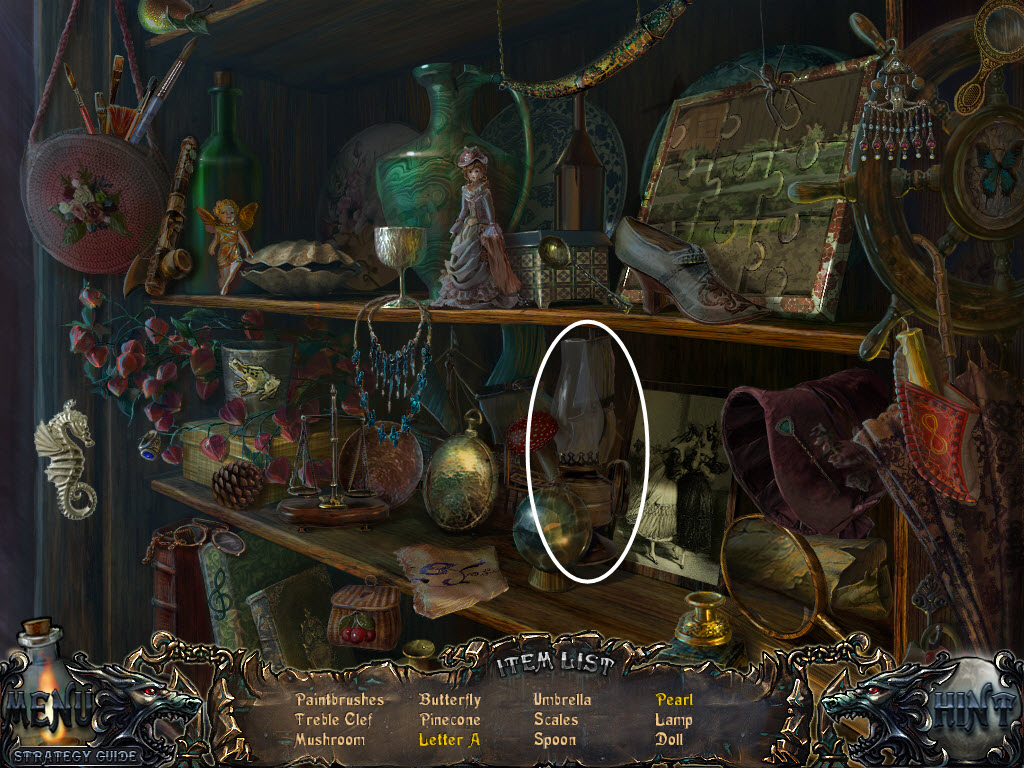
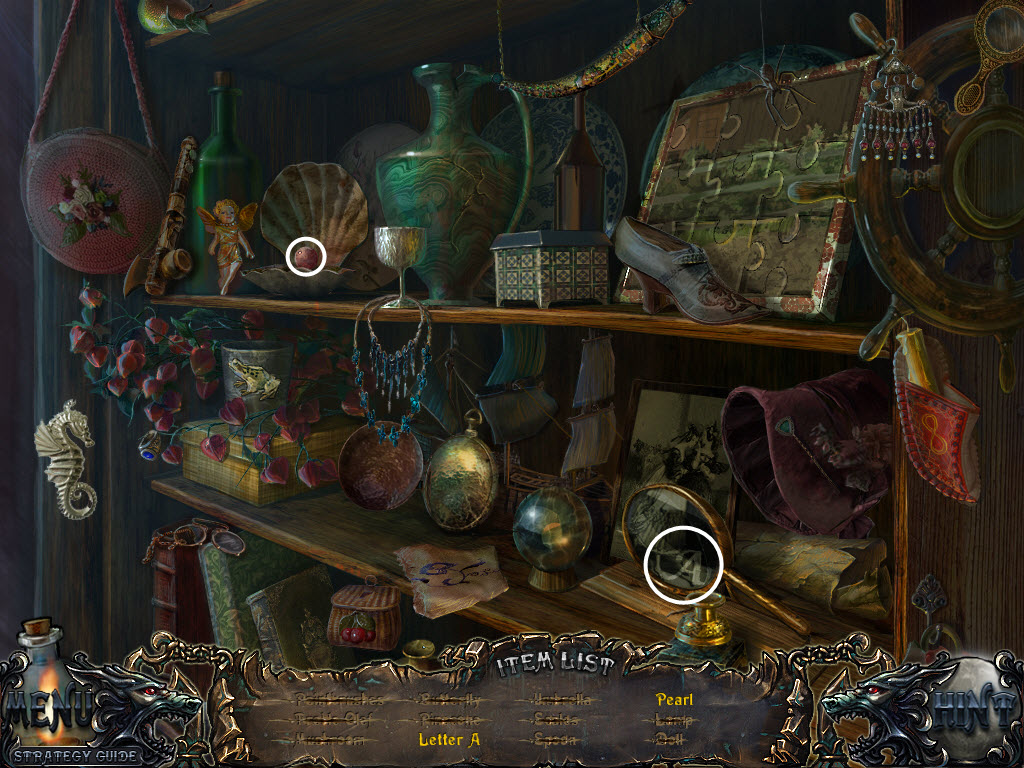
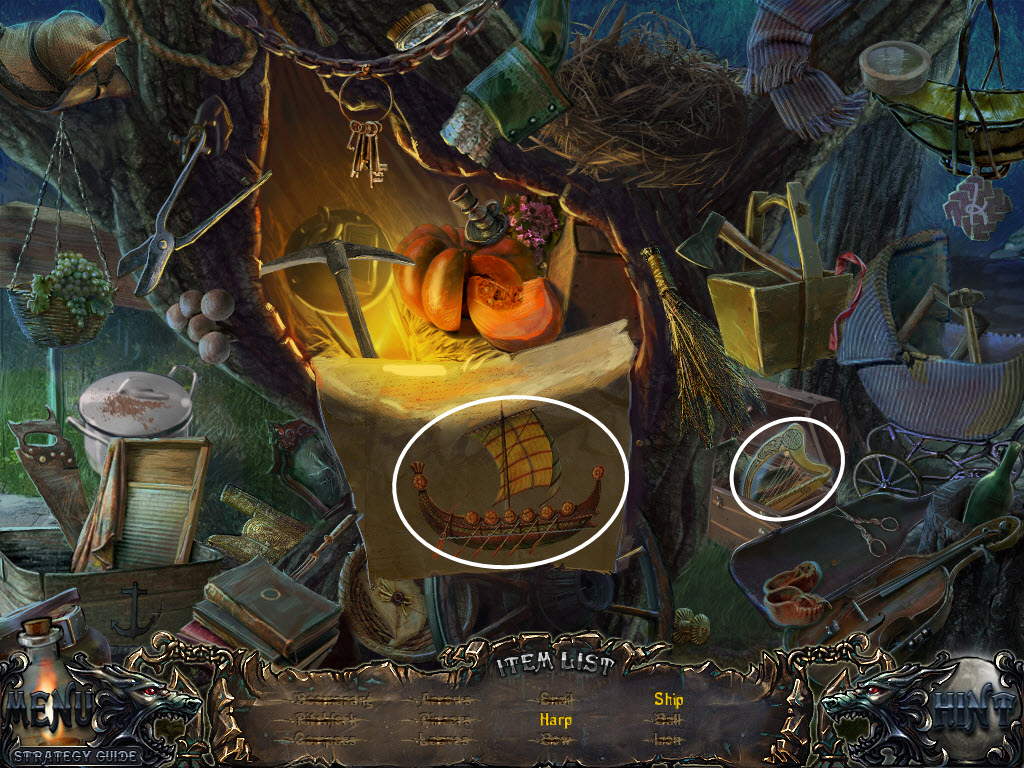
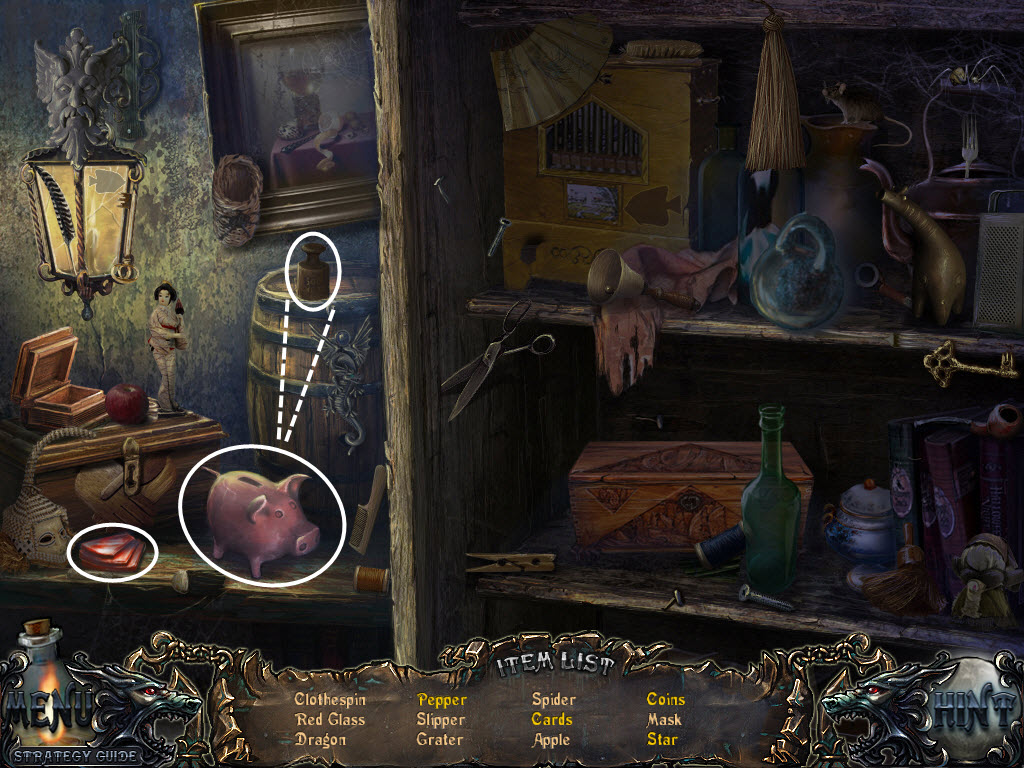
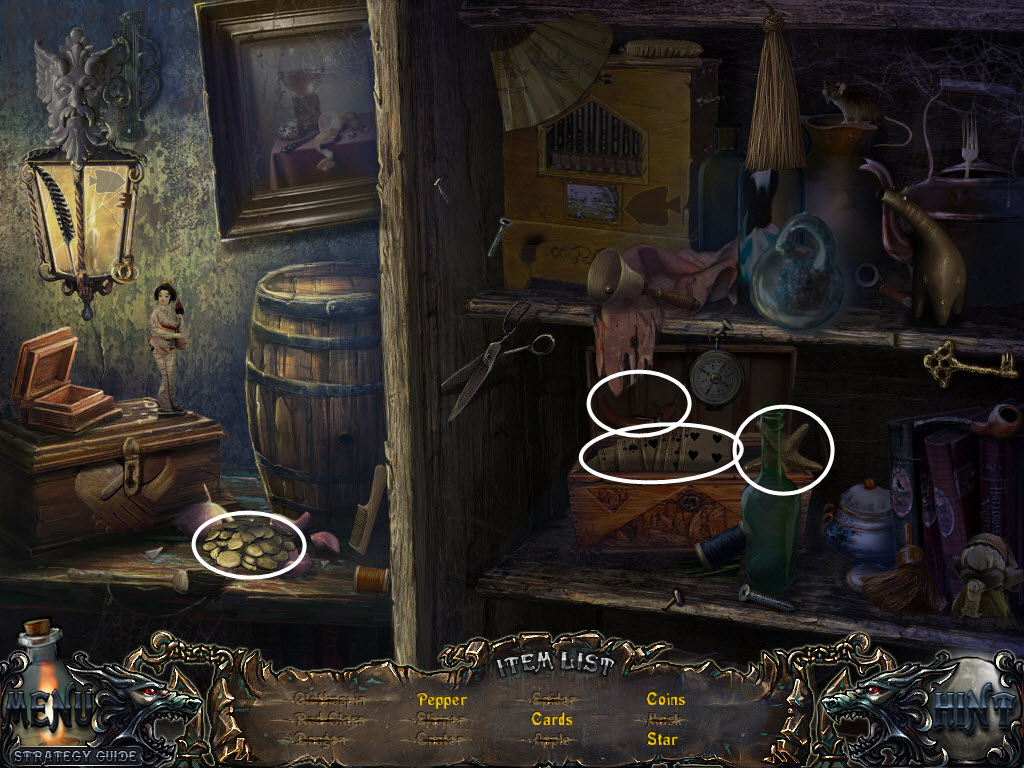
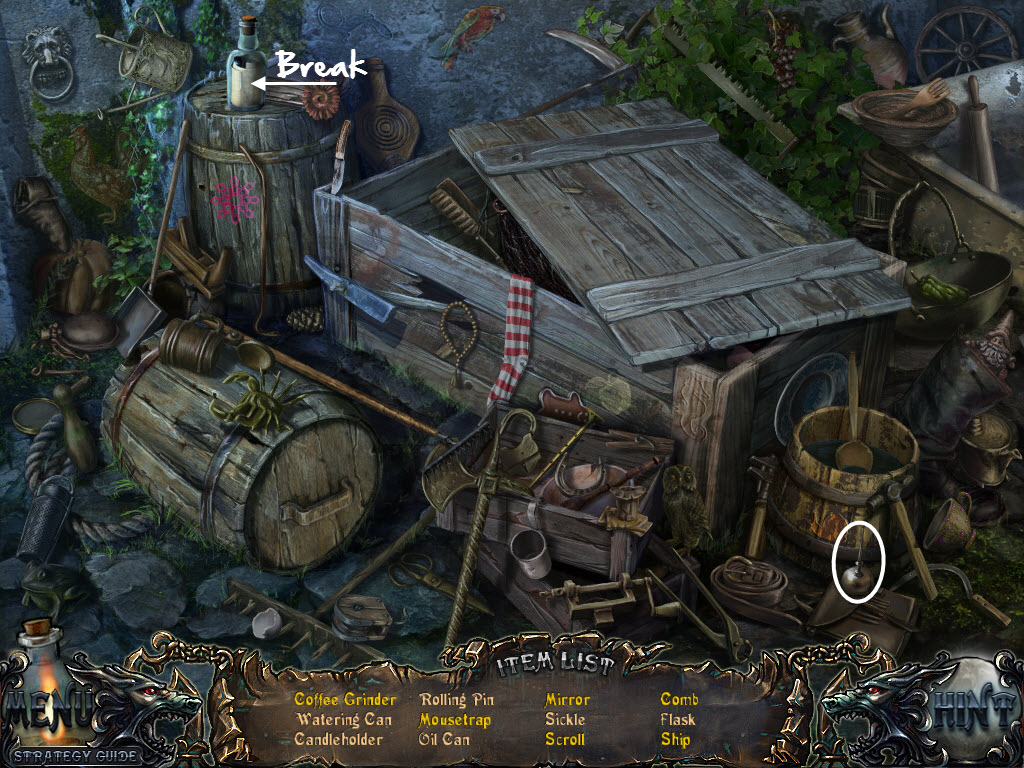
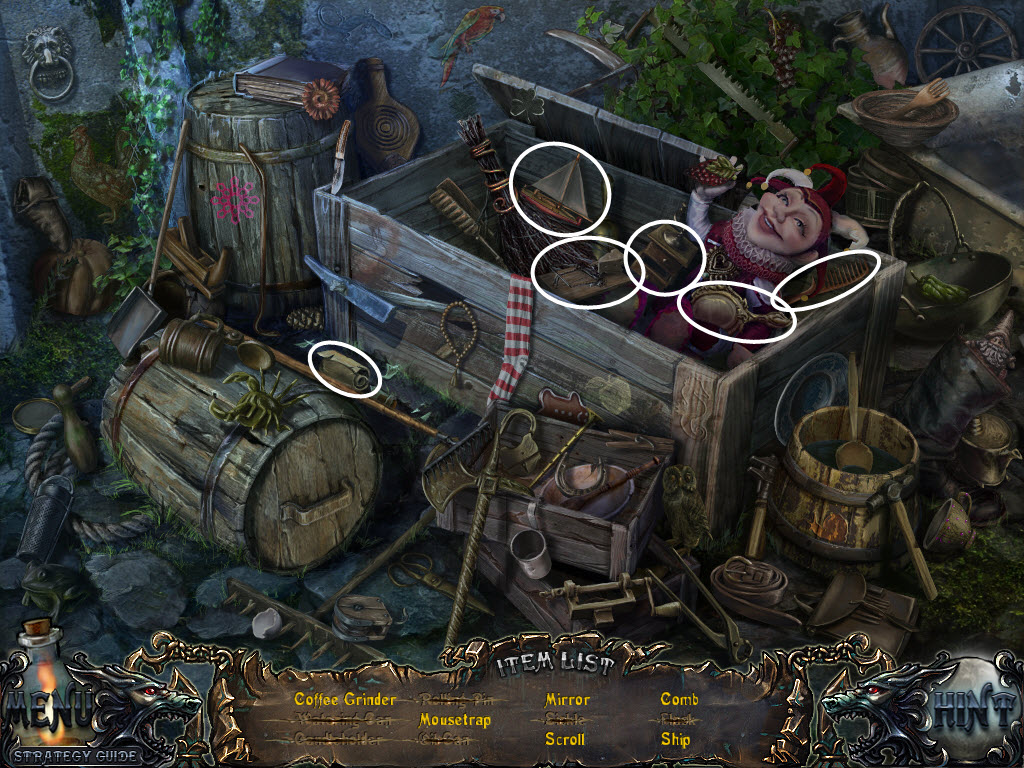
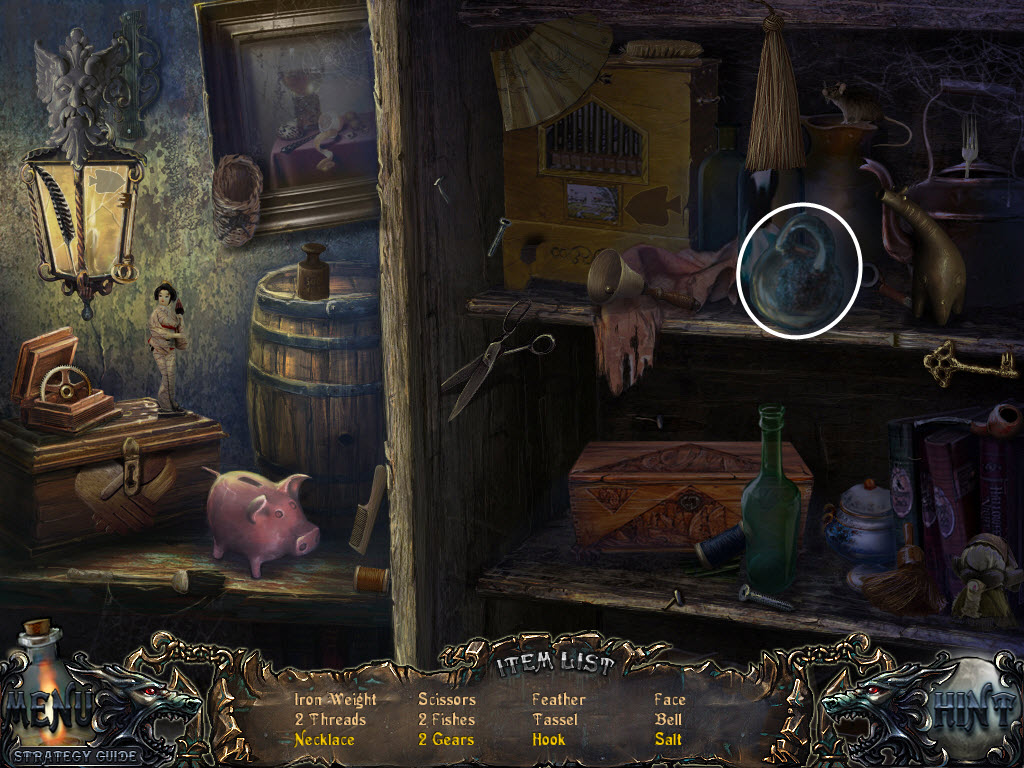
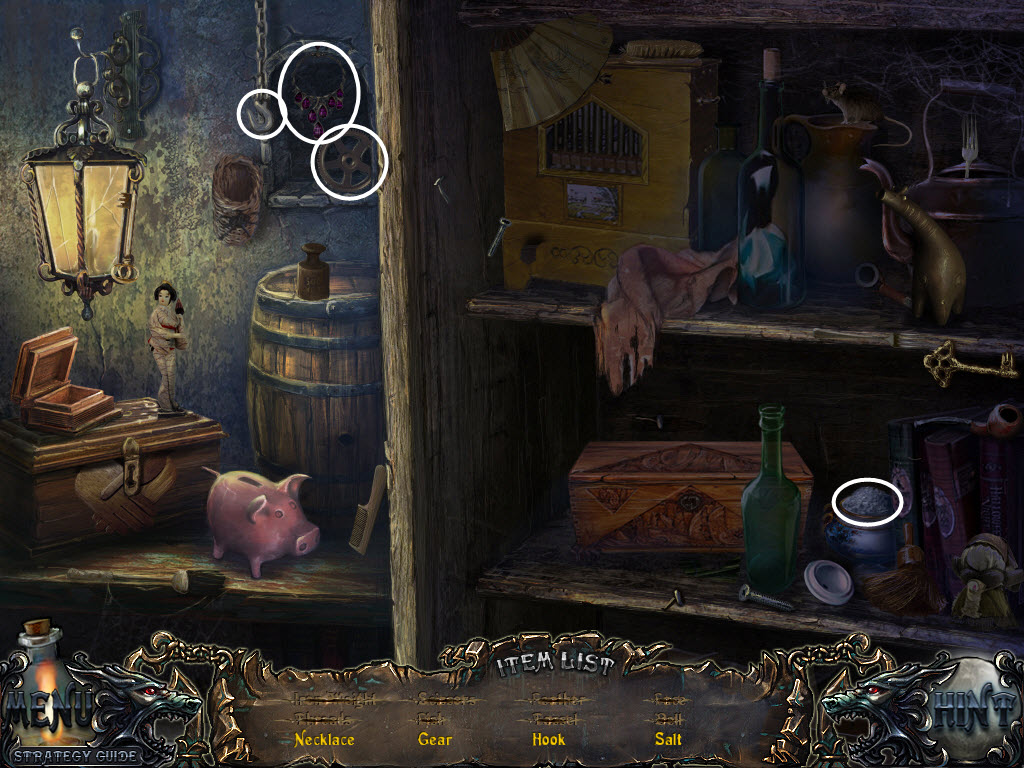
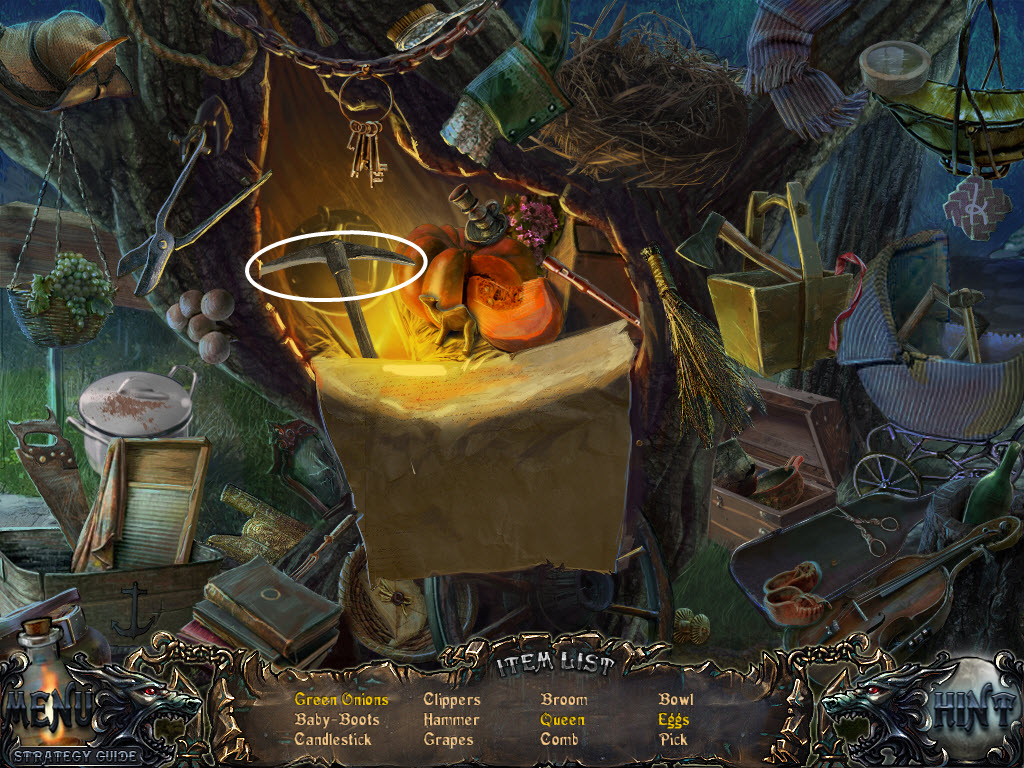
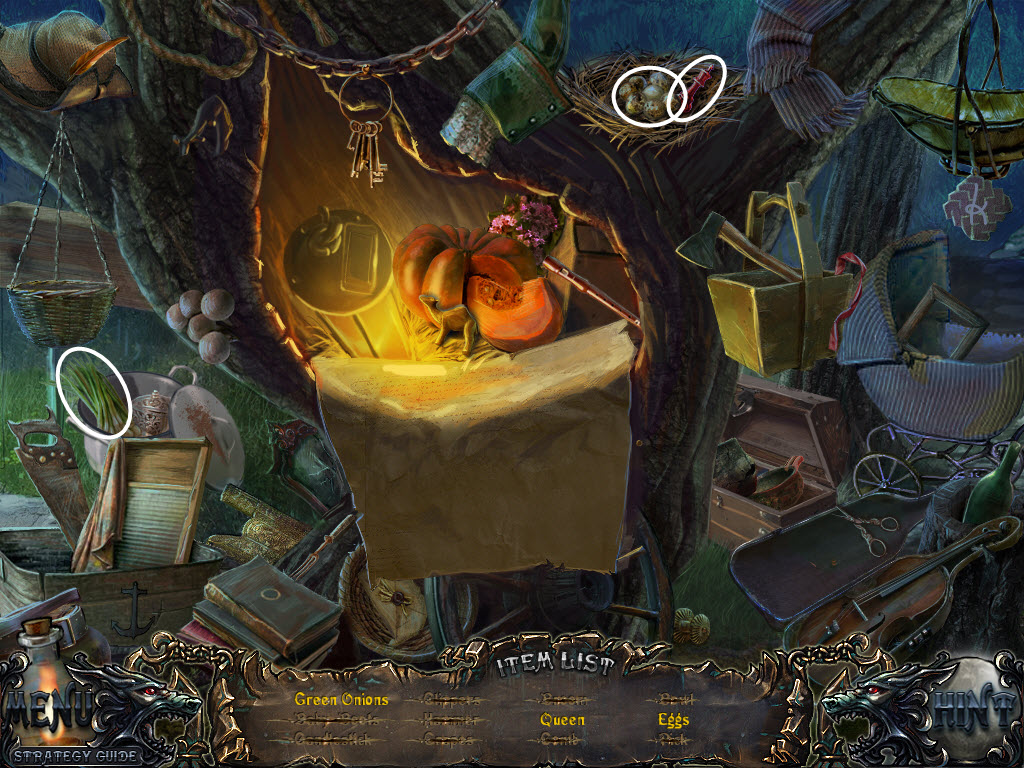
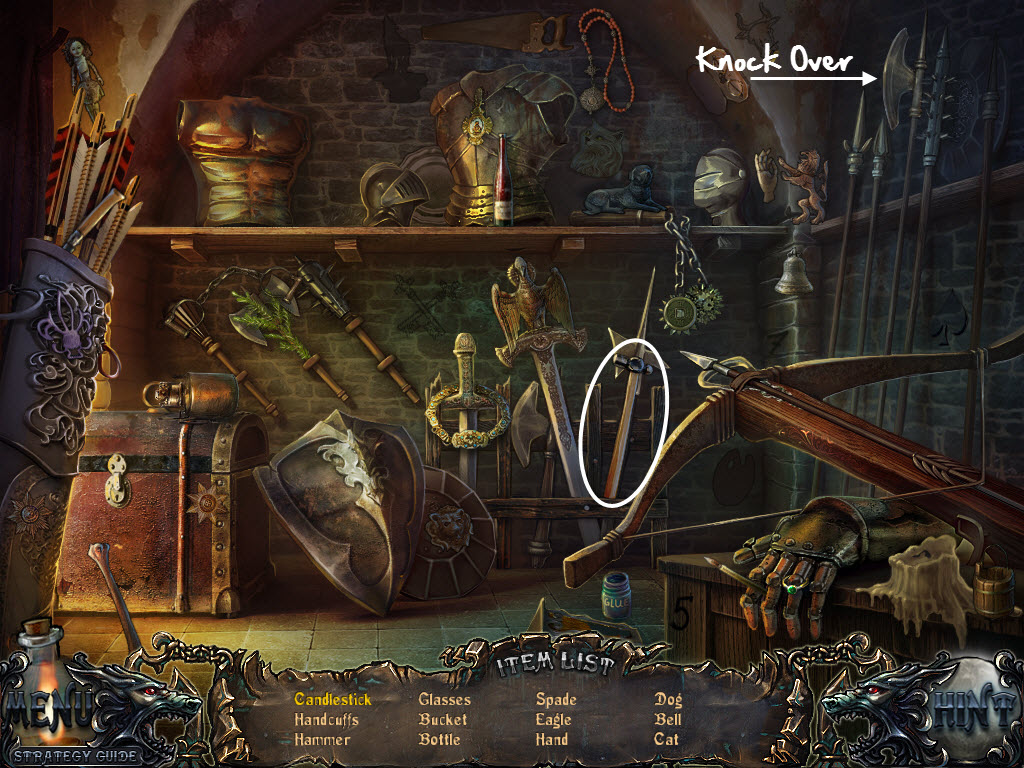
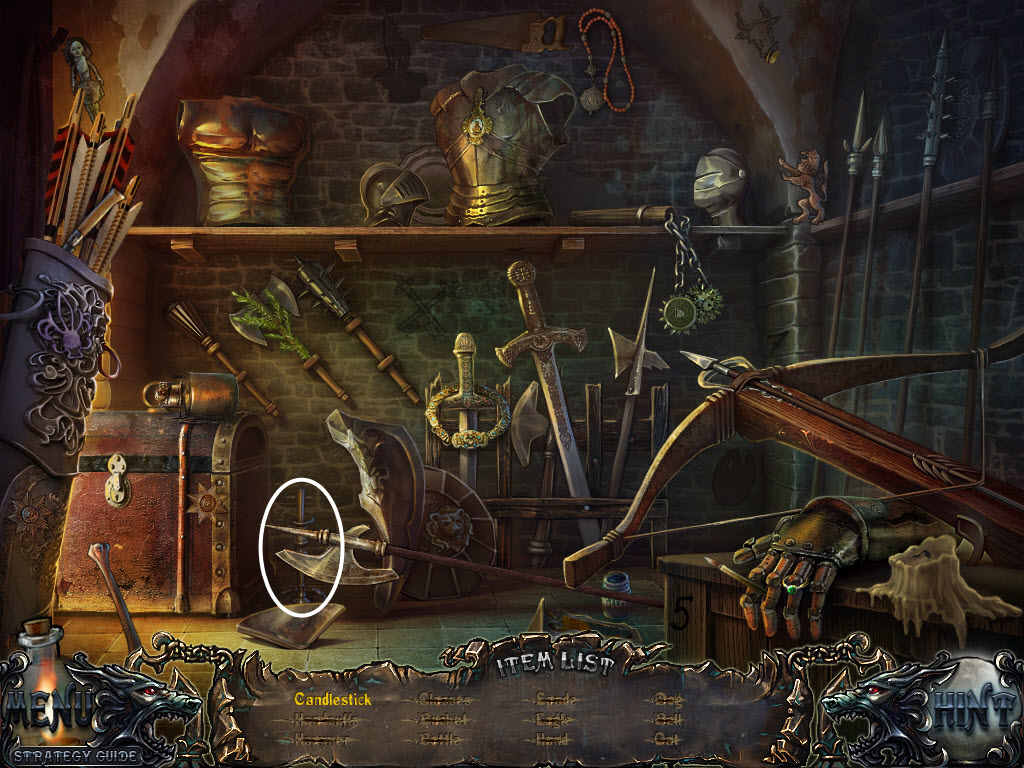
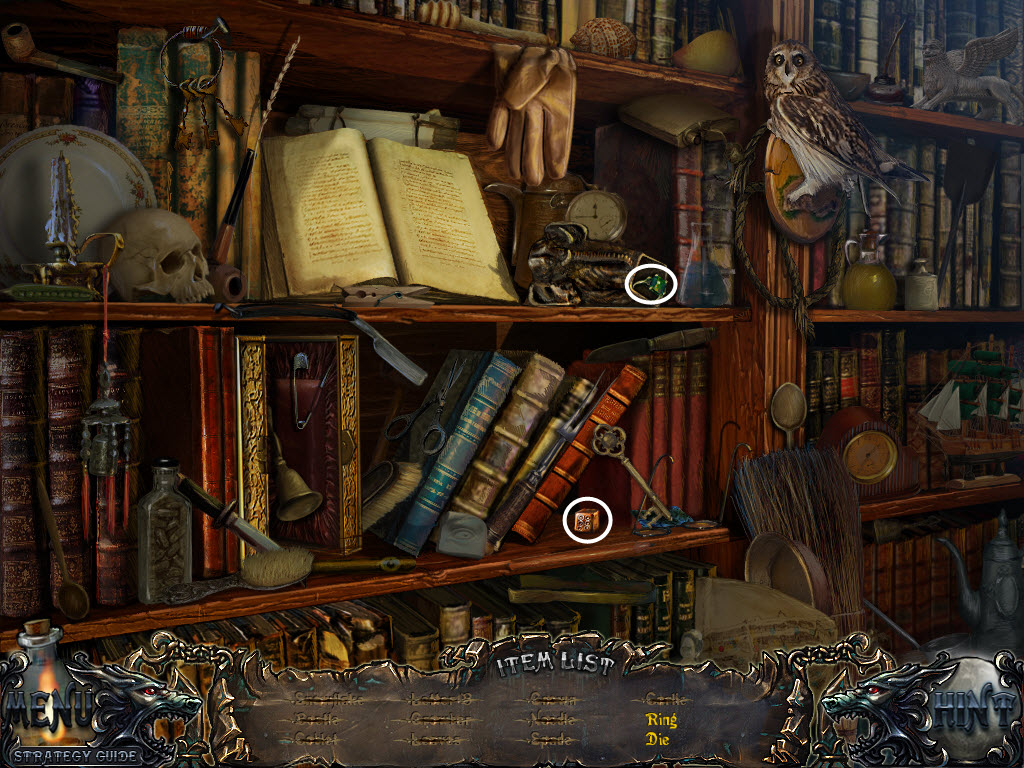
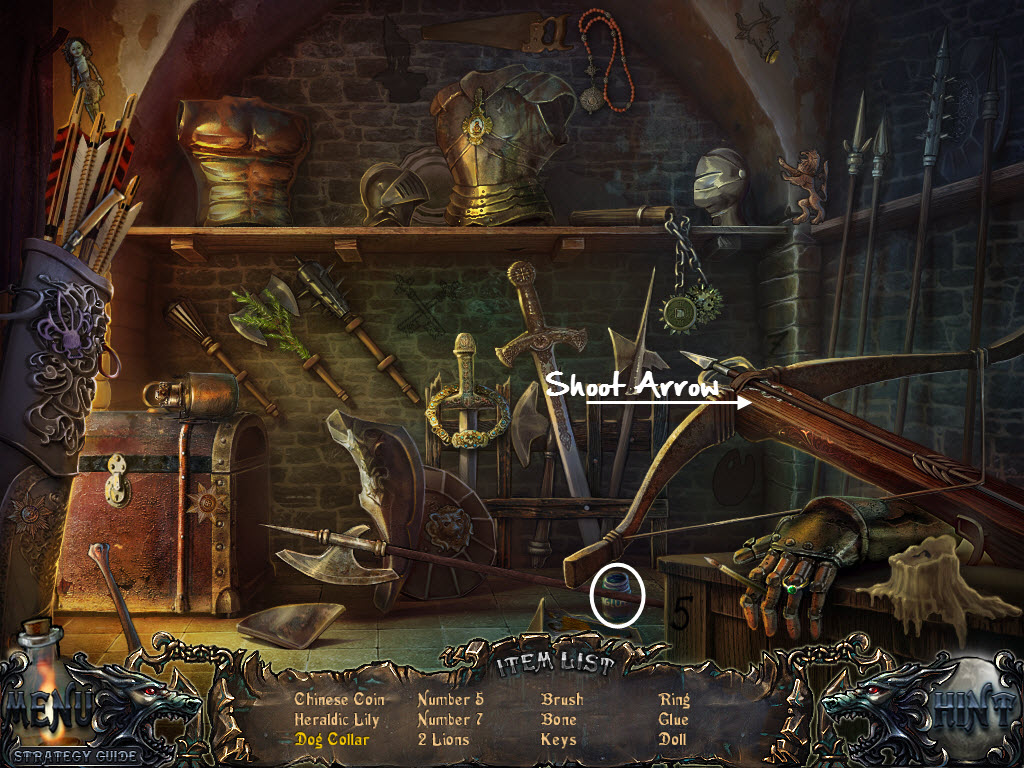
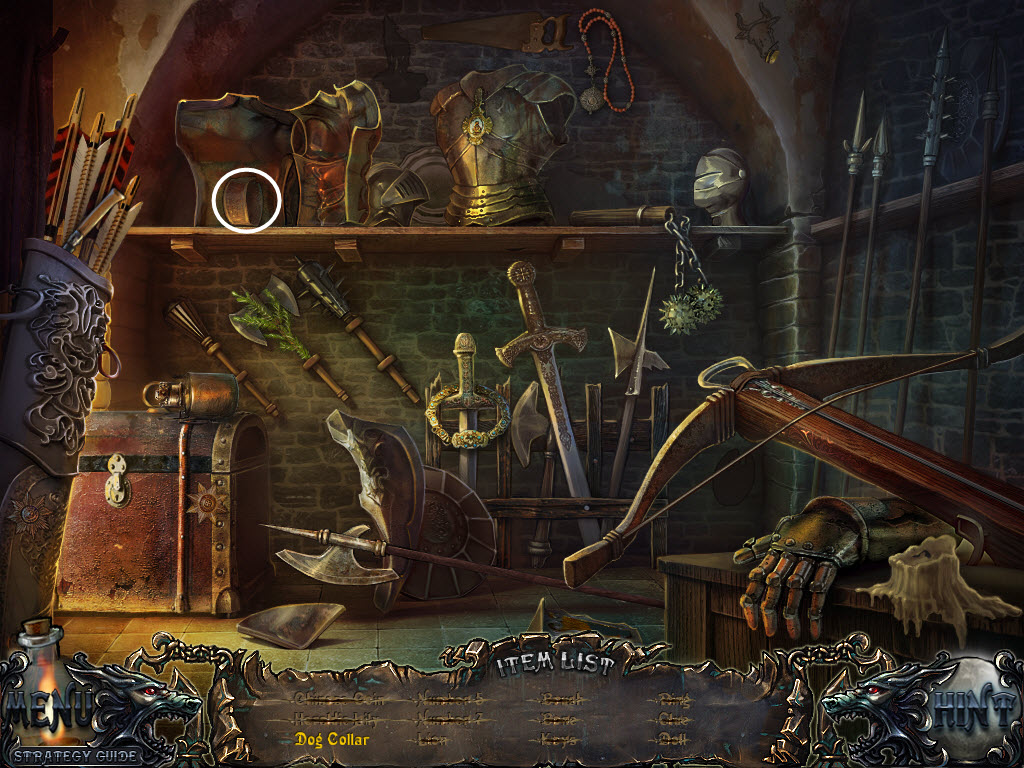
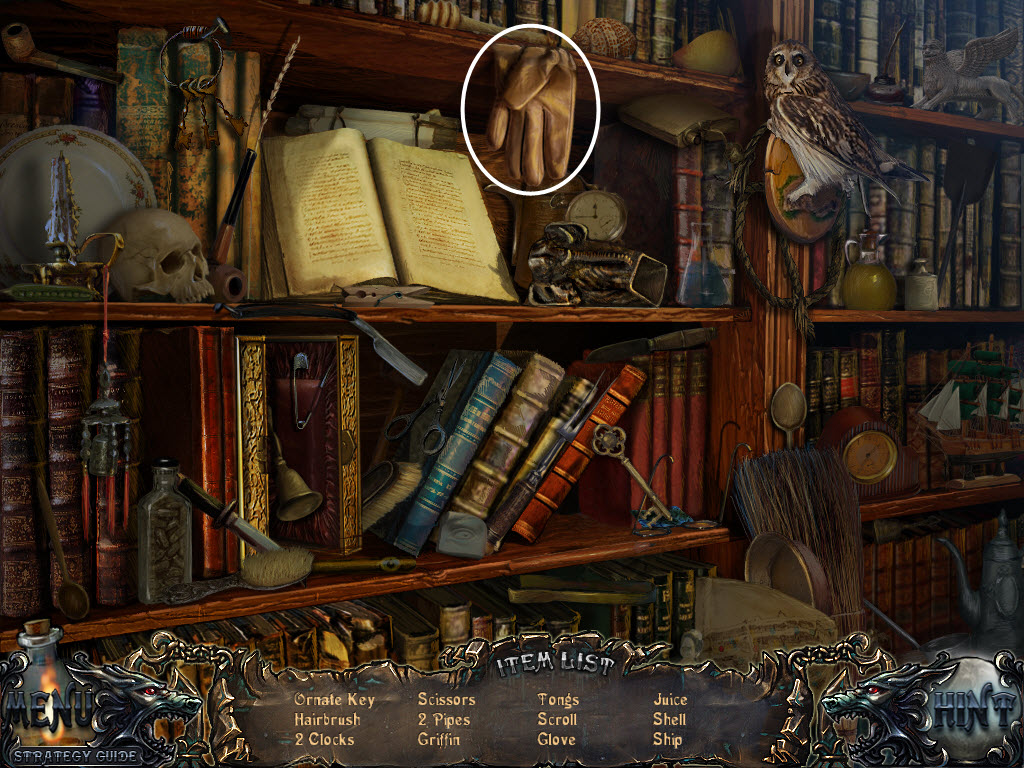
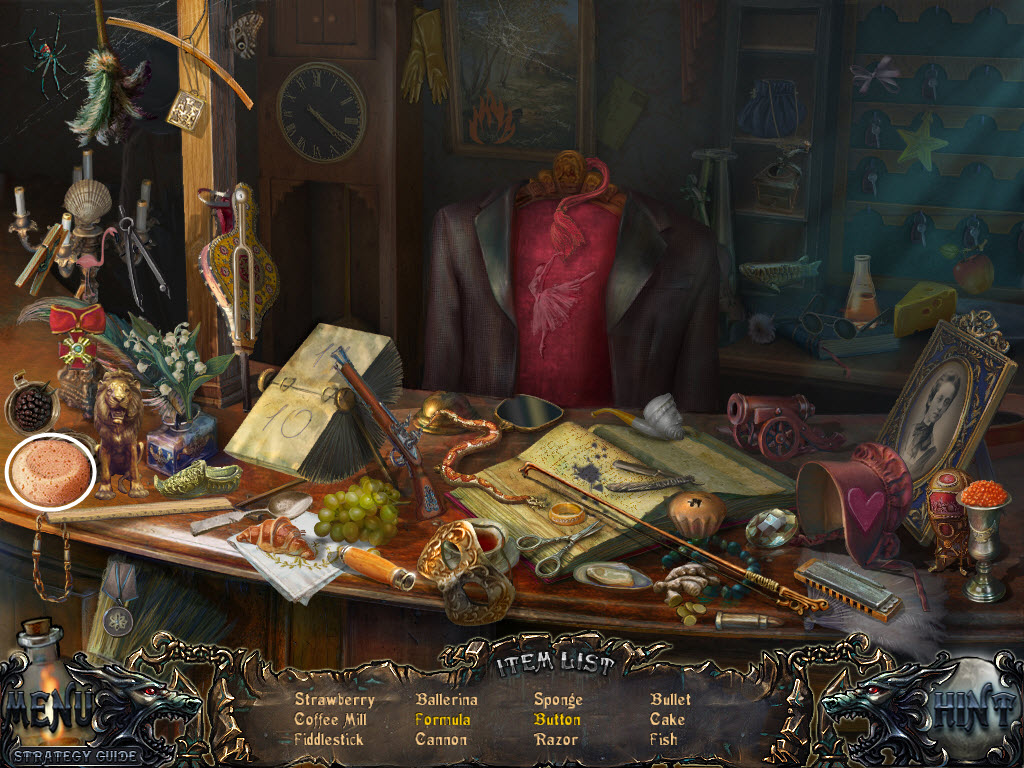
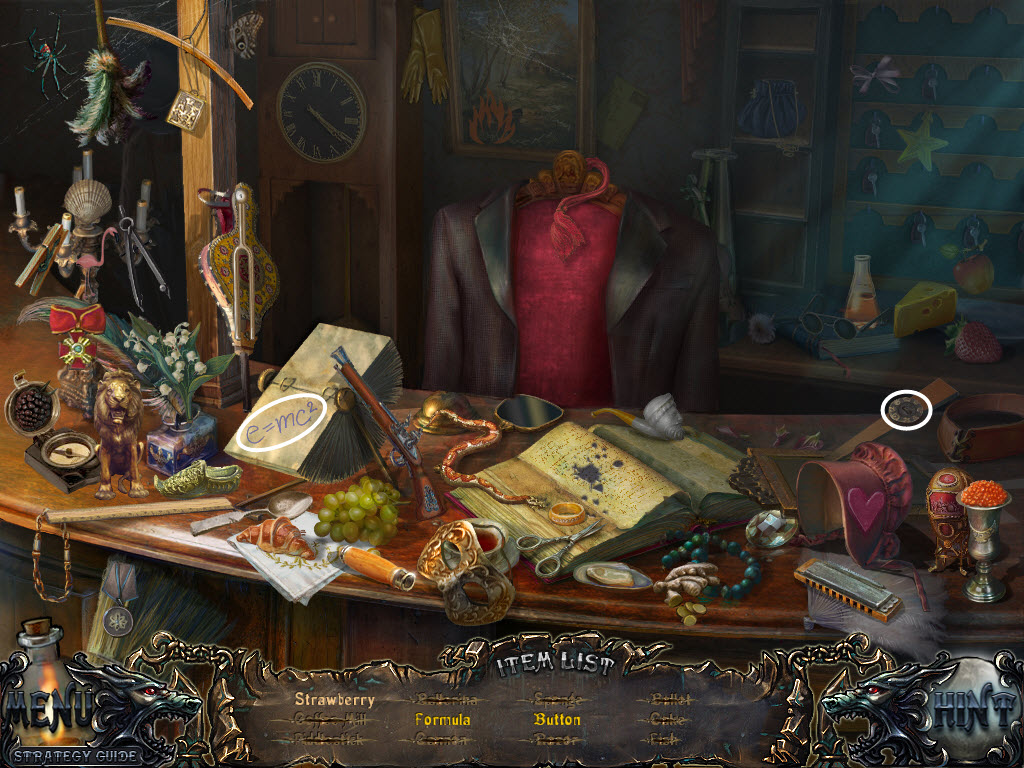
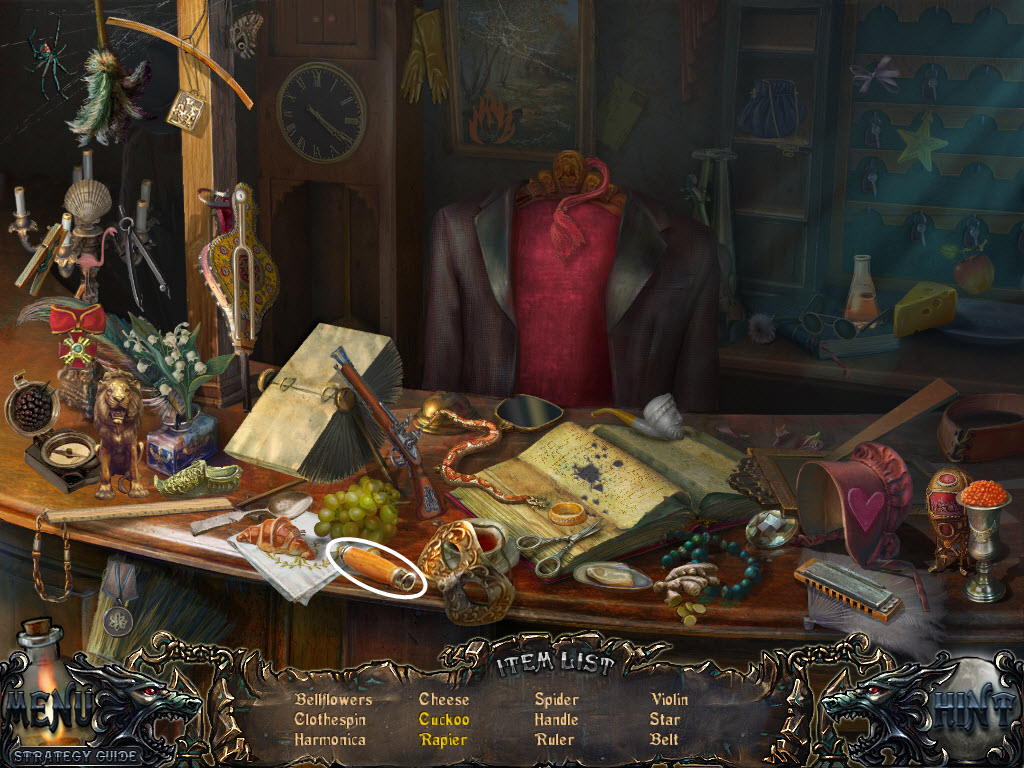
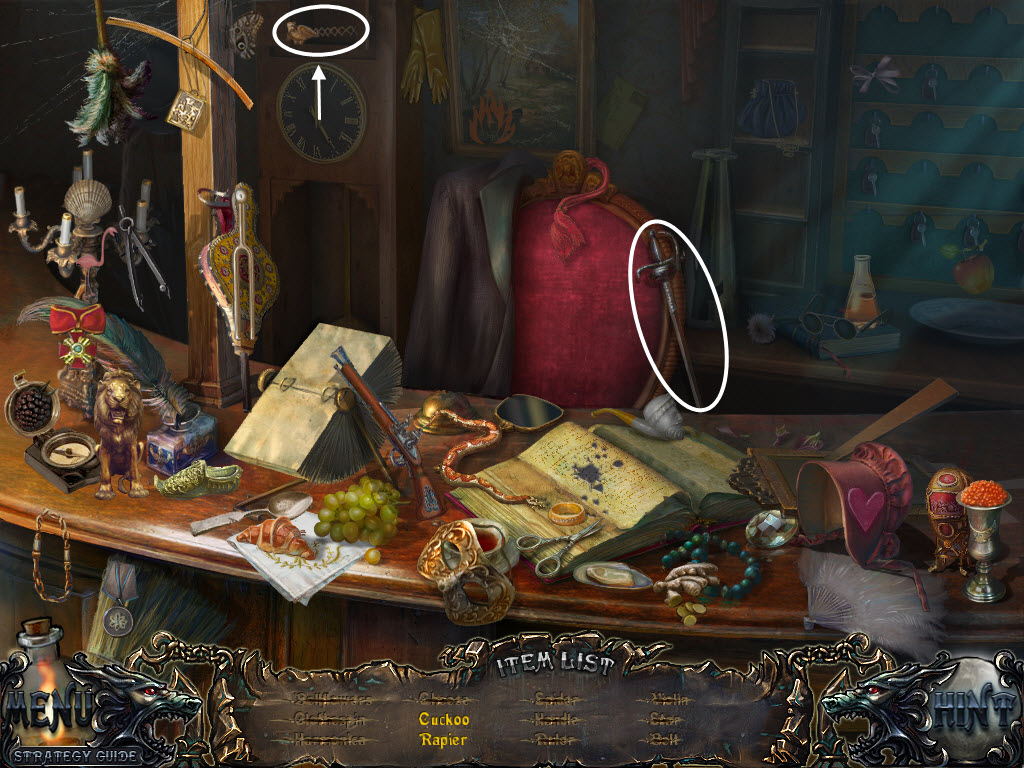
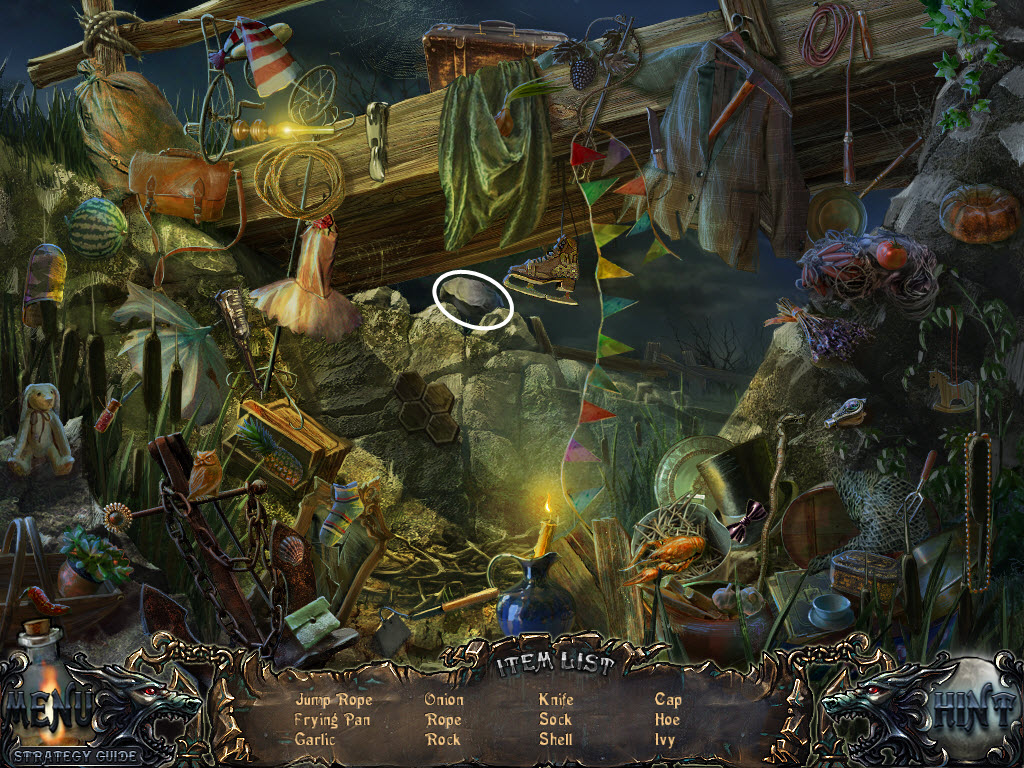
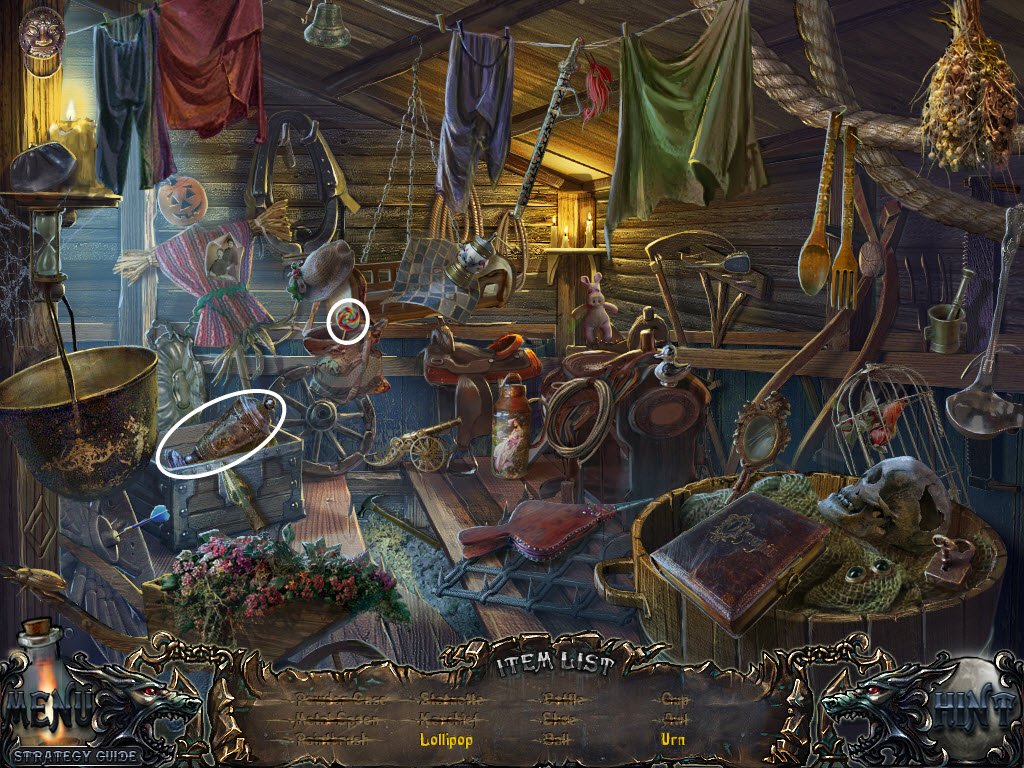
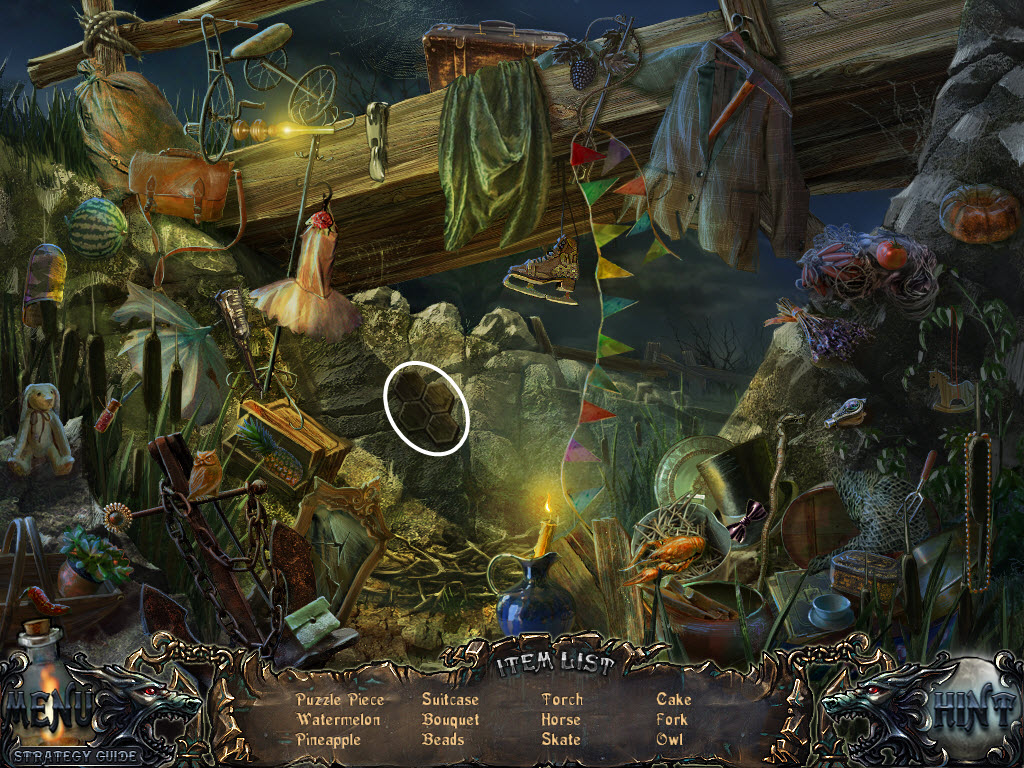
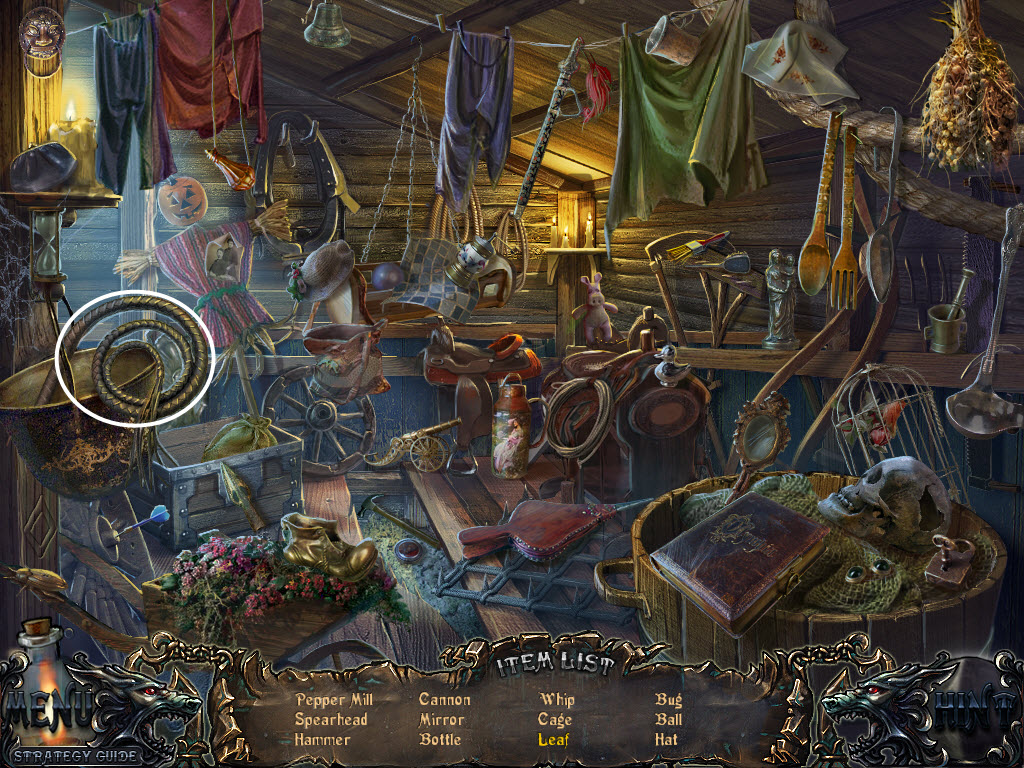
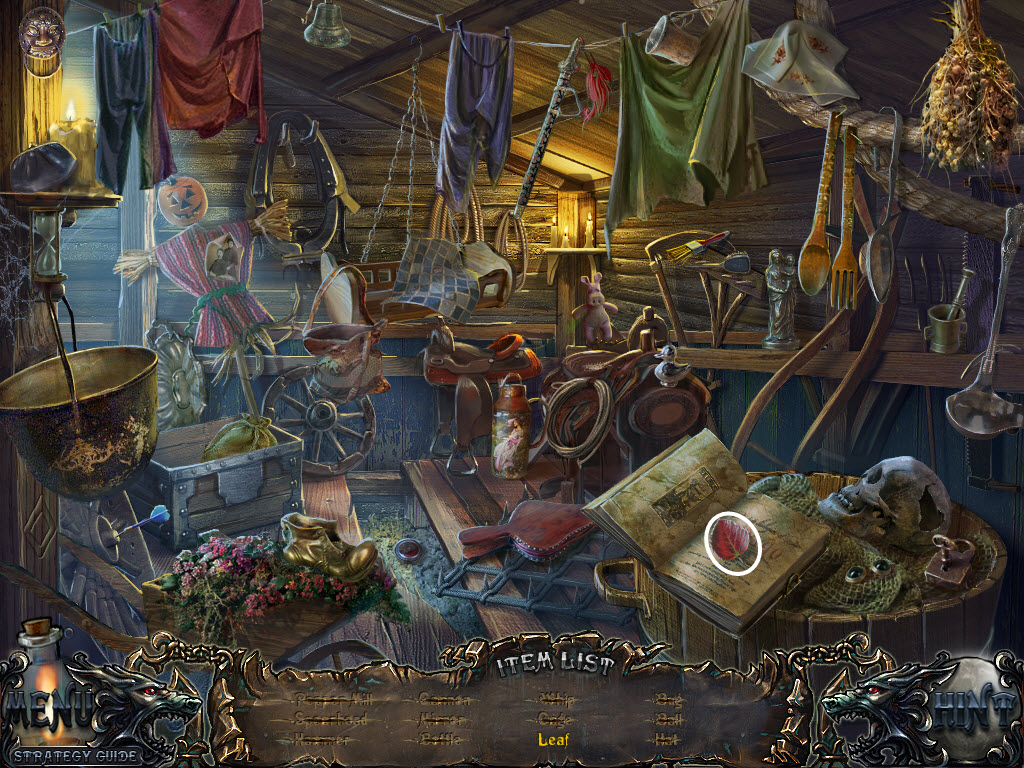
Hidden Object Areas: Items are random for every player, inventory items will be circled. Items in yellow mean another action must be performed to obtain the highlighted item, these will also be circled/noted.
Shadow Wolf Mysteries: Curse of the Full Moon
Chapter 1
Chapter 2
Chapter 3
Chapter 4
Chapter 5
Chapter 6
Chapter 7
Chapter 8
Chapter 1
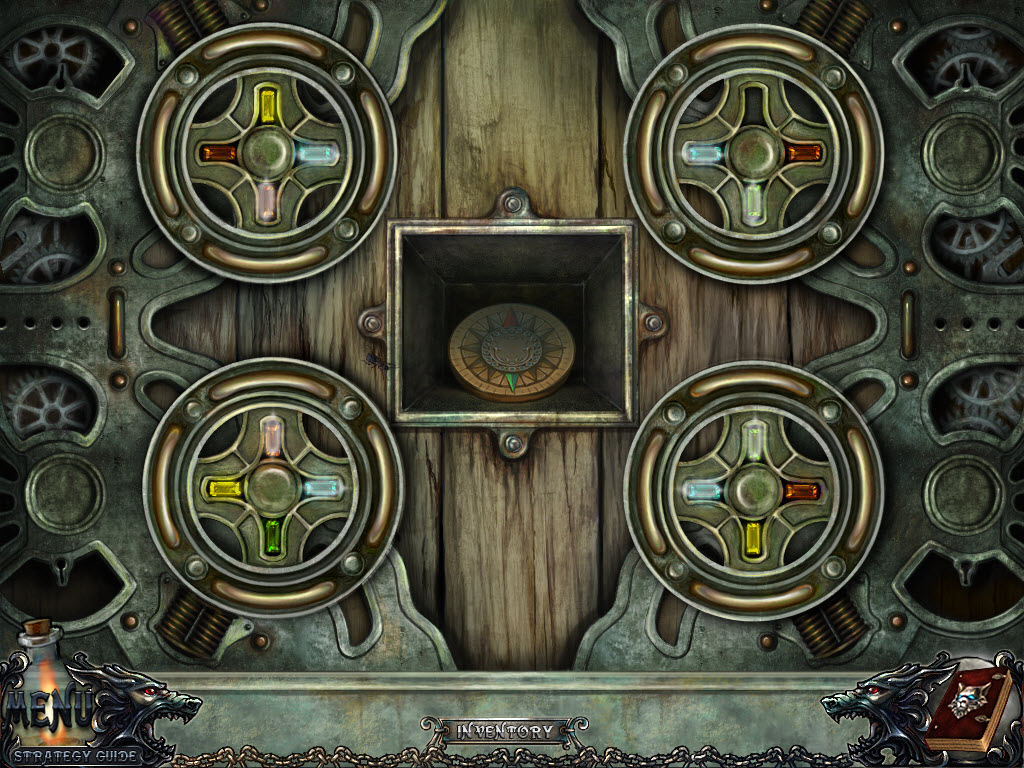
Note: I had trouble getting a screenshot, but the left side does show the correct locks
Hints: These are unlimited, but must refill.
Hidden Object Areas: Items are random for every player, inventory items will be circled. Items in yellow mean another action must be performed to obtain the highlighted item, these will also be circled/noted.
Shadow Wolf Mysteries: Curse of the Full Moon
Chapter 1
Chapter 2
Chapter 3
Chapter 4
Chapter 5
Chapter 6
Chapter 7
Chapter 8
Chapter 1
- speak to Gerard
- scare the crow away
- click on the well
- take the Bucket of Water
- examine the grate under the window
- read the note
- pick up the Hook
- examine the grate again
- use the Hook to retrieve the Medallion
- go into the residence on the right
- pull back the curtain
- speak to the little girl
- examine the table beside the little girl
- take the Key
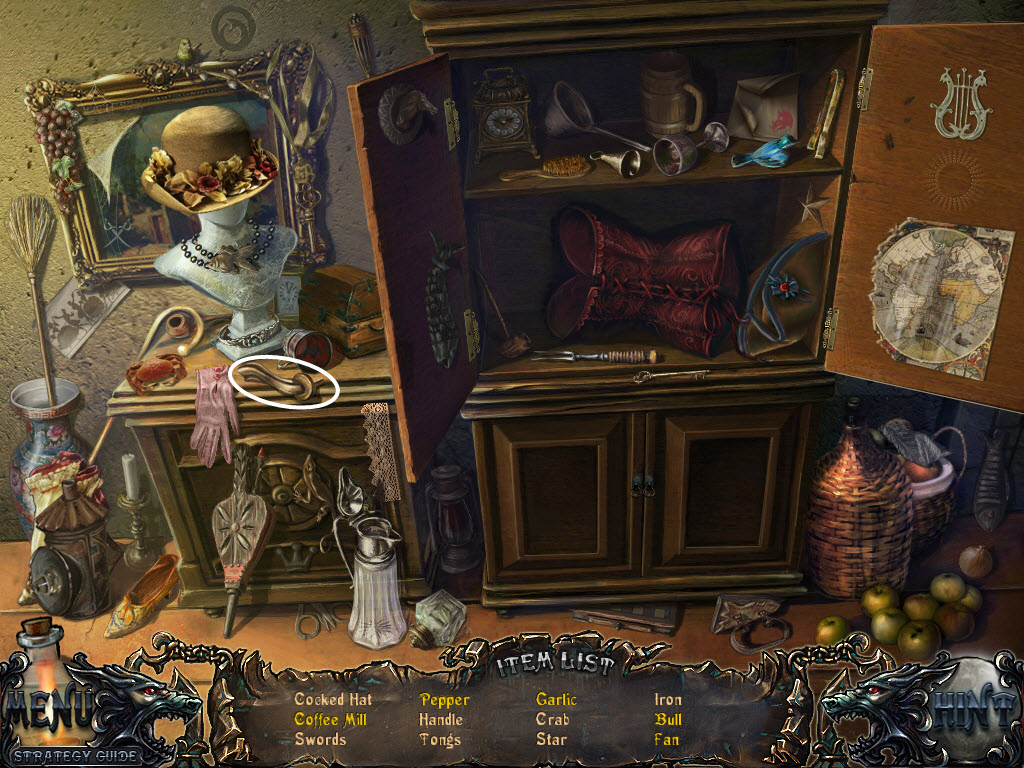
- examine the cupboard and use the Key on the lock
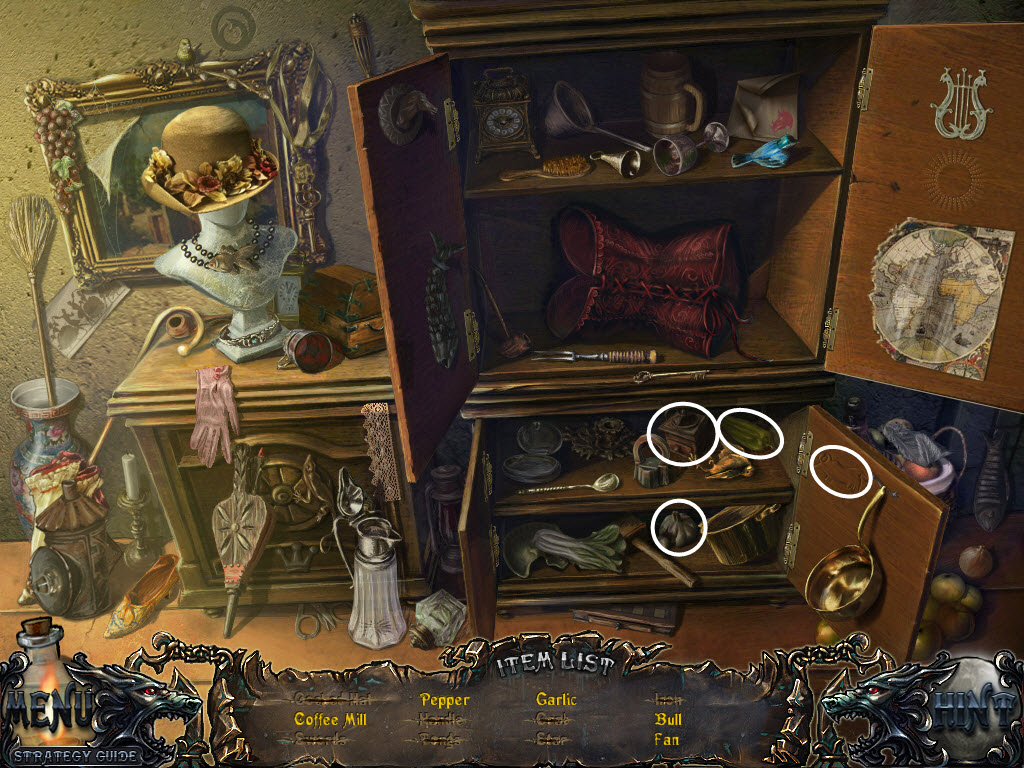
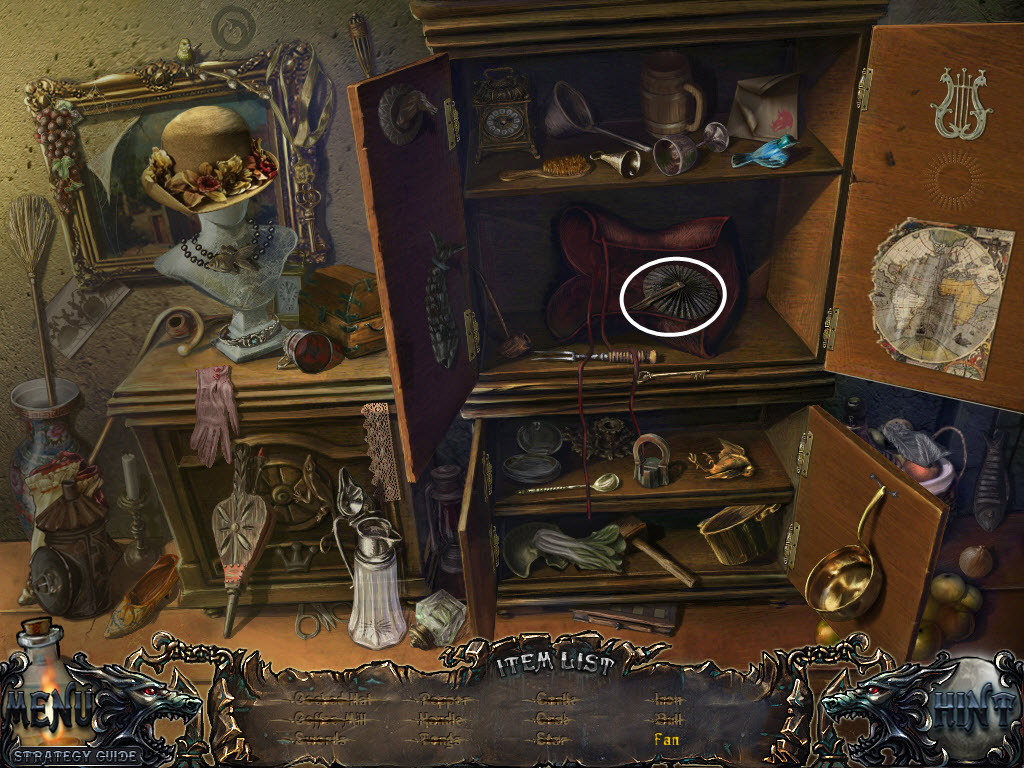
- look inside the cupboard - hidden object area
- take the Handle
- examine the door on the right
- replace the Handle
- go through the door
- examine the drawer on the left
- take the Gold Butterfly
- examine the right cupboard door directly above the drawer
- take the Blue Pinhead
- examine the portrait
- take the Brush
- use the Bucket of Water to put out the fire
- examine the wood pile and take the Gold Pinhead
- go down
- pull the cloth off the basket
- open the basket and look inside
- Basket Puzzle
- replace the Gold and Blue Pinheads
- move the pinheads around so they match the picture in the upper-left corner
- this puzzle is random
- take the Trap
- go though the door
- place the Trap on the floor by the chain
- take the Dull Knife from the little girl
- exit the residence
- talk to Gerard
- go forward
- read the board and take the Lantern
- examine the hole in the wall underneath the window
- use the Brush on the cobwebs
- take the Empty Bottle
- notice the blood on the ground
- continue forward
- click on the wolf
- examine the window on the left
- place the Gold Butterfly in the music box
- take the Clock Hands
- examine the window on the right
- go right
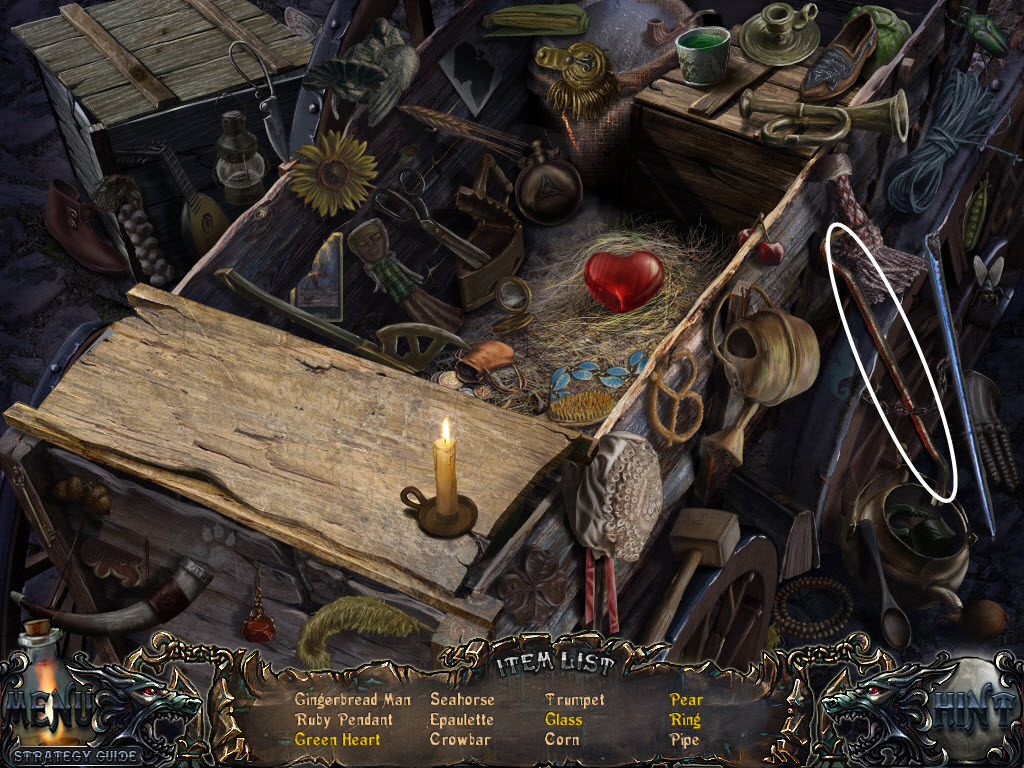
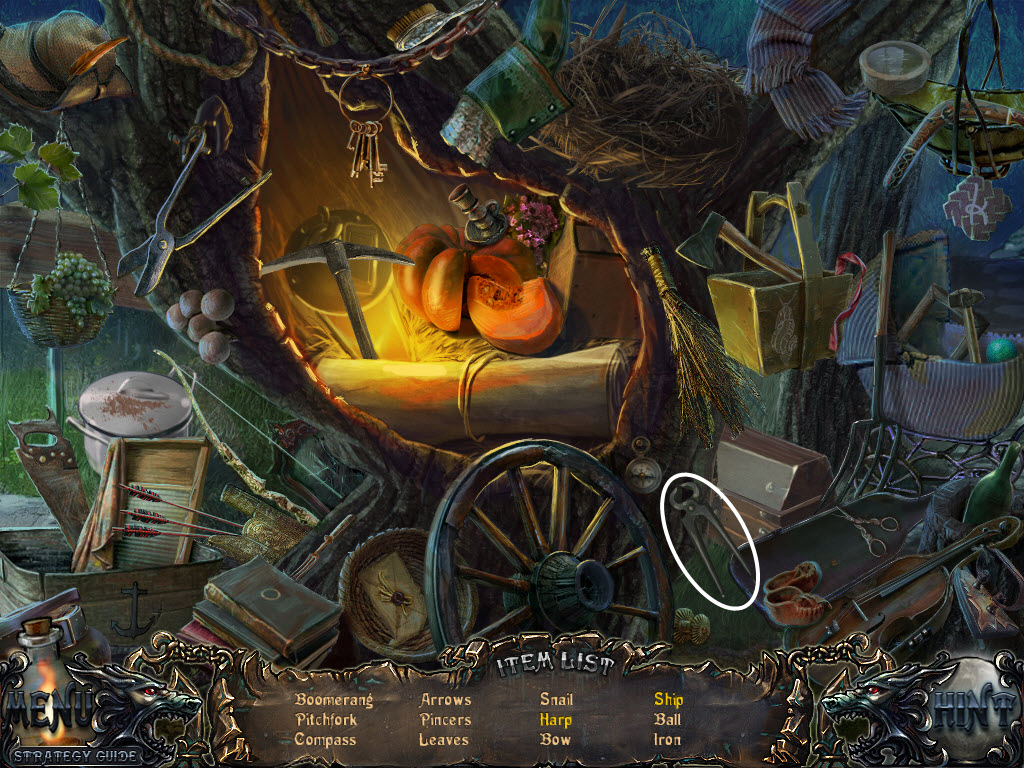
- examine the carriage - hidden object area
- take the Crowbar
- go down and continue forward
- click on the wolf
- examine the tool shed - to the left of the gates
- click the peddle several times to spin the wheel fast
- use the Dull Knife on the spinning wheel to sharpen it
- receive Sharp Knife
- examine the small door
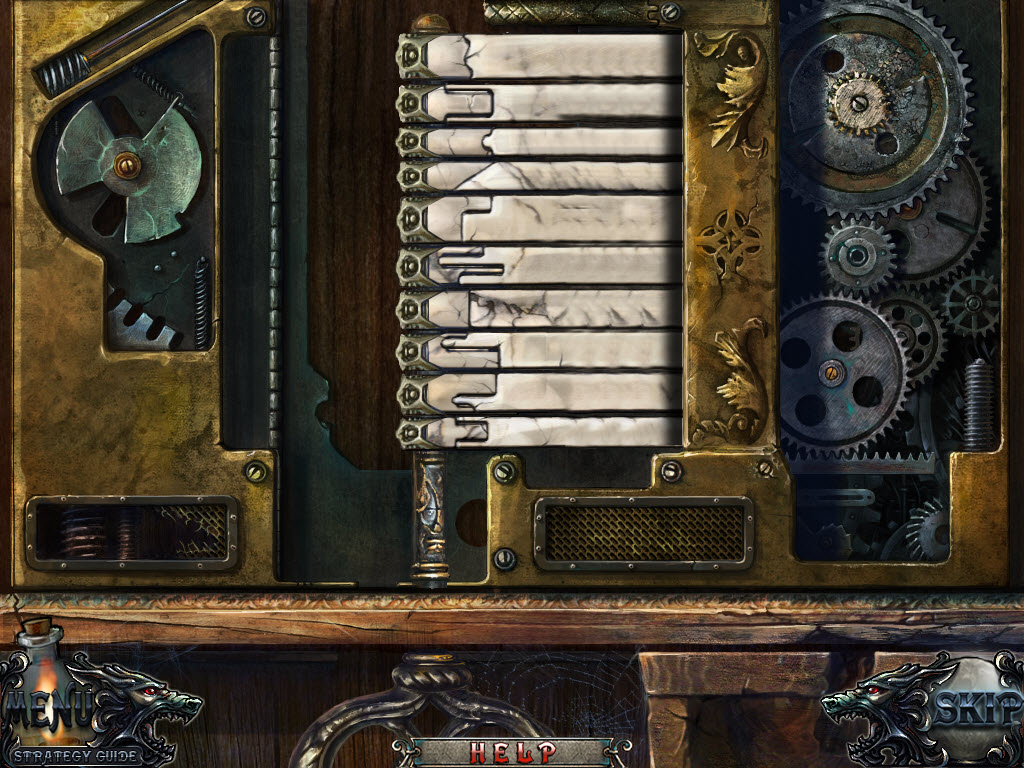
- Door Puzzle
- use the arrows on all sides to arrange the tiles so they match the pictures on the left
- see video for solution(s)
- look inside
- use the Sharp Knife to cut the rope
- go through the gate
- click on the wolf
- examine the fire pit on the right
- take the Flint Stone
- continue forward
- talk to Gerard
- give the Lantern to Gerard
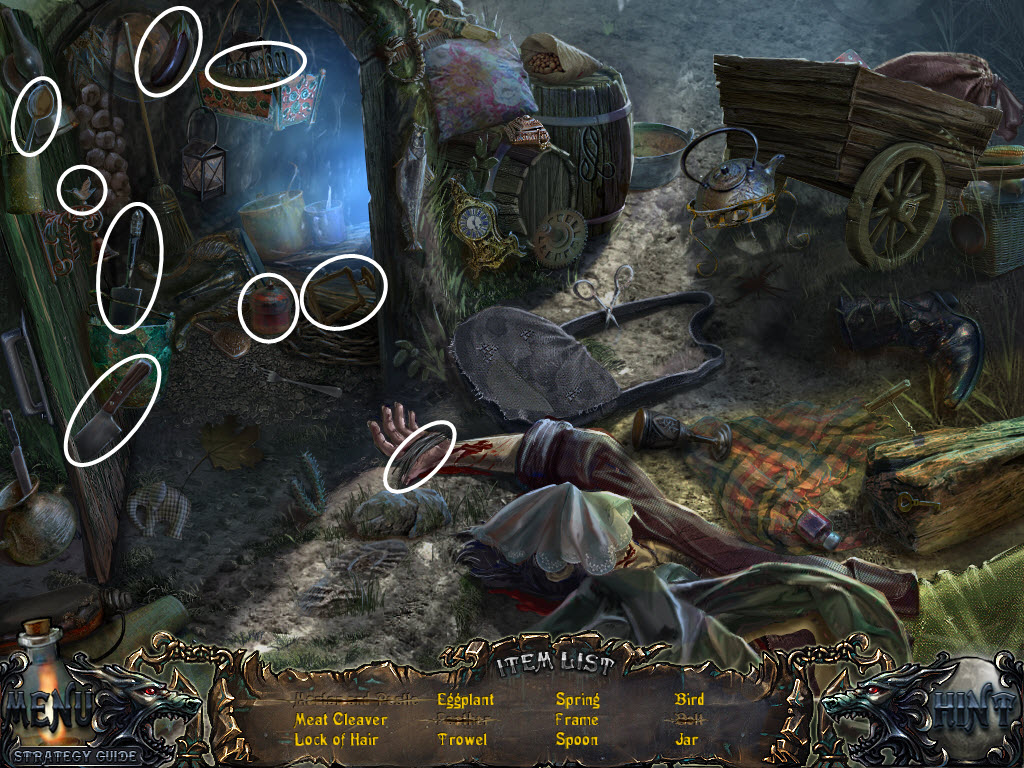
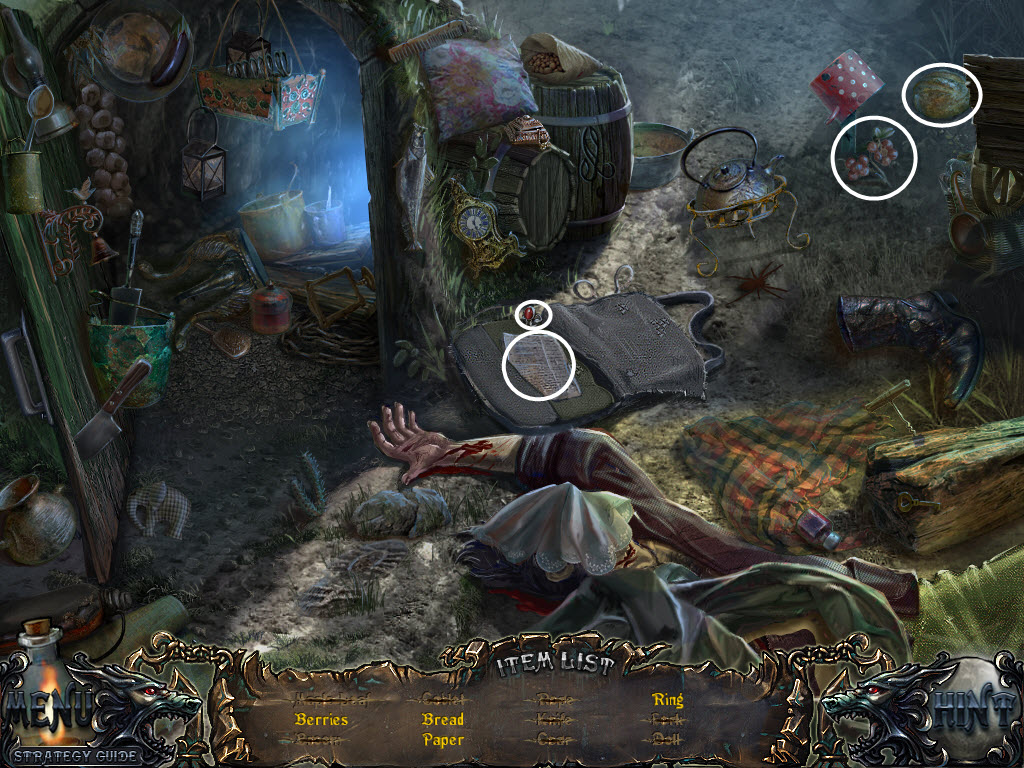
- examine the body - hidden object area
- take the Lock of Hair
- go left
- examine the table and take the Screwdriver
- make a note of the drawing
- open the chest against the back wall
- take the Ink Pot
- examine the clock
- replace the Clock Hands
- Clock Puzzle
- move the hands so the colors of the hand match the colors on the clock face
- moving one hand will cause another hand to move
- take the Circus Ticket
- go down and continue forward
- talk to Madlen
- give Madlen the Circus Ticket
- enter the tent
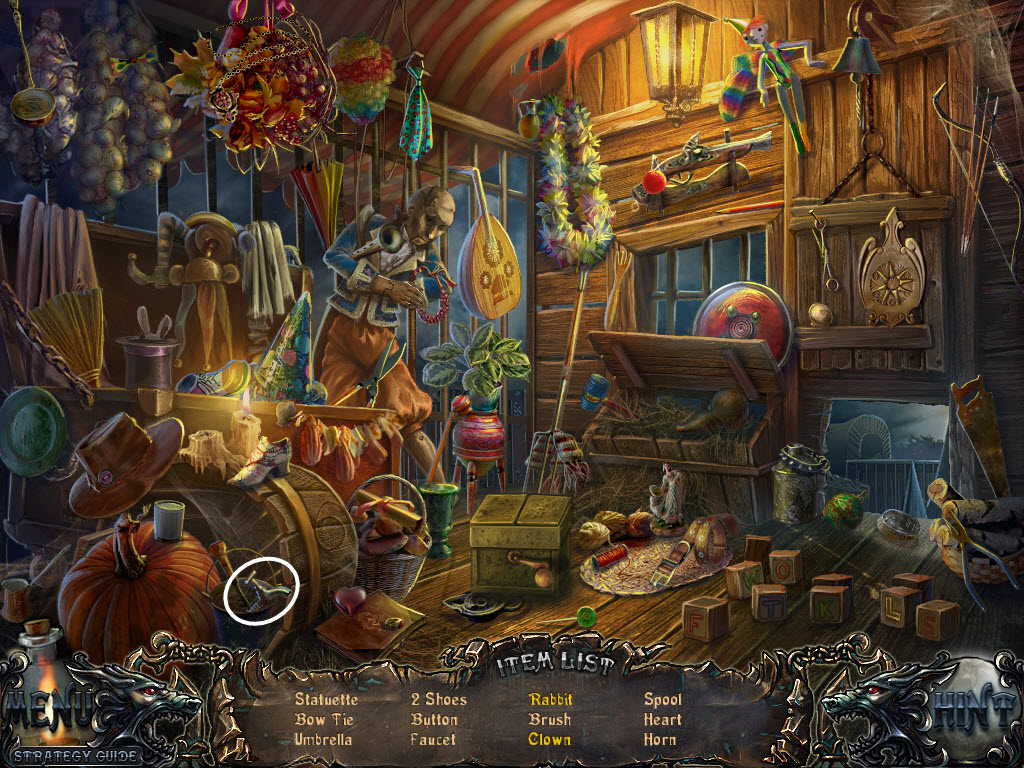
- examine the cage - hidden object area
- take the Faucet
- go left
- examine the crate on the right
- use the Crowbar on the nails
- open the crate and move the items around
- take the Ornate Disc
- go down and enter the circus tent
- talk to Madlen
- turn the bullseye
- Bullseye Puzzle
- turn the discs so the colors match either other top/bottom, left/right
- example: if the bottom of the top disc is green, then the top of the bottom disc should also be green
- see screenshot for solution
- take the Ornate Disc
- examine the cabinet
- Cabinet Puzzle
- replace the Ornate Discs
- rotate the discs so the colored arrows are pointing to
their matching colored dots0
- take the Saw
- go down twice
- examine the cart on the right
- use the Screwdriver on the screws holding the box shut - one is above the lock and one is below
- open the box and take the Tranquilizer
- go forward and left
- use the Tranquilizer on the wolf
- use the Saw to cut open the cage
- examine the inside of the cage and take a Lock of Hair
- go down
- examine the cage - hidden object area
- take the Doorknob
- go down twice
- examine the body - hidden object area
- take the Paper
- examine the barrel/keg
- use the Faucet on the keg
- place the Empty Bottle beneath the Faucet and turn the handle
- take the Wine Bottle
- go forward
- examine the gypsy wagon
- place the Paper on the ink press
- use the Ink Pot on the ink press
- click the handle twice
- take the Prefecture Pass
- go down five times and right once
- examine the door on the left
- use the door knocker and give the Prefecture Pass to the man
- enter the building
- examine the desk
- flip through the pages of the book
- open the drawer
- Colored Ball Puzzle
- move the colored balls around so they red, green, and blue are in their matching spots
- this puzzle is random
- take the Lens
- go down the stairs
- pick up the Spade
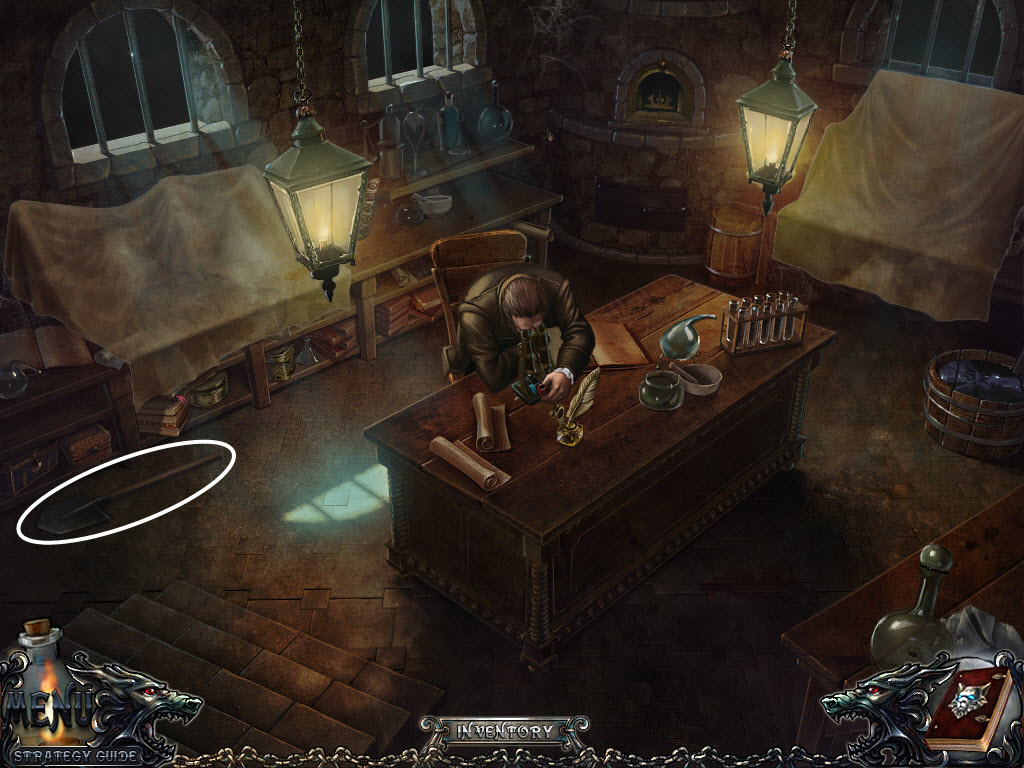
- talk to Gerard
- examine the microscope
- Microscope Puzzle
- replace the Lens
- place each Lock of Hair under the microscope
- find the differences between the two samples and remove the pieces of hair that do not match - there are three in total
- examine the work area under the right window
- open up the piece of crumpled paper and receive the Code Piece
- go down
- examine the desk
- replace the Code Piece
- examine the locked drawers on the left
- put the code from the book (1379)
- take the NH4OH
- examine the map
- go down
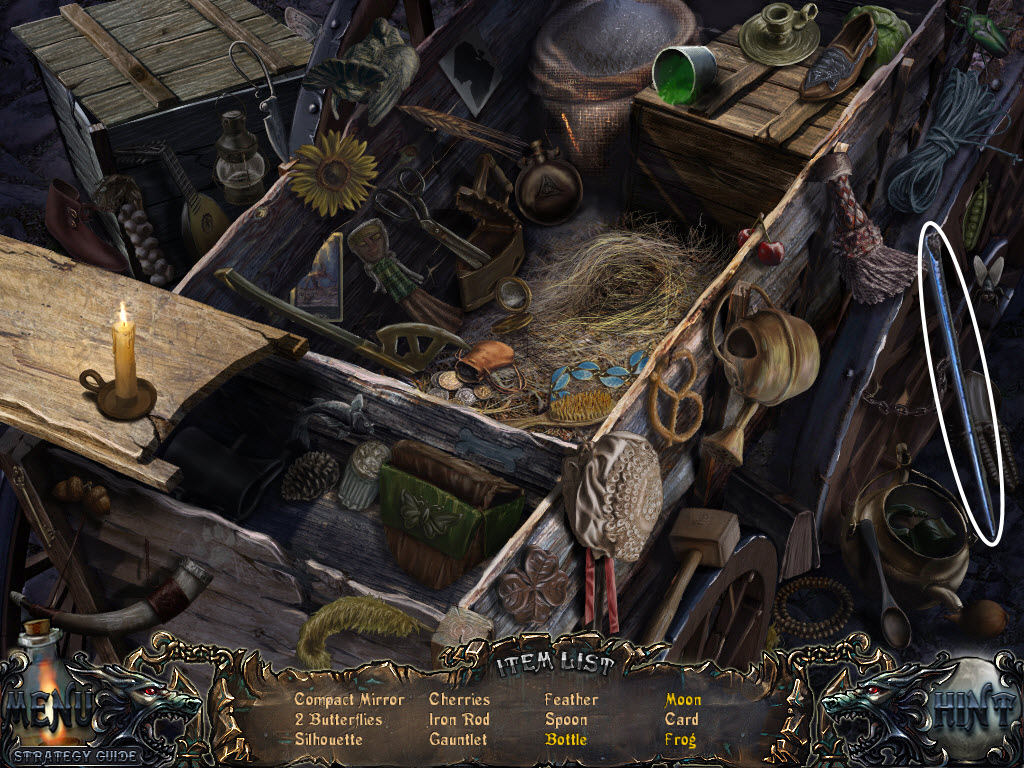
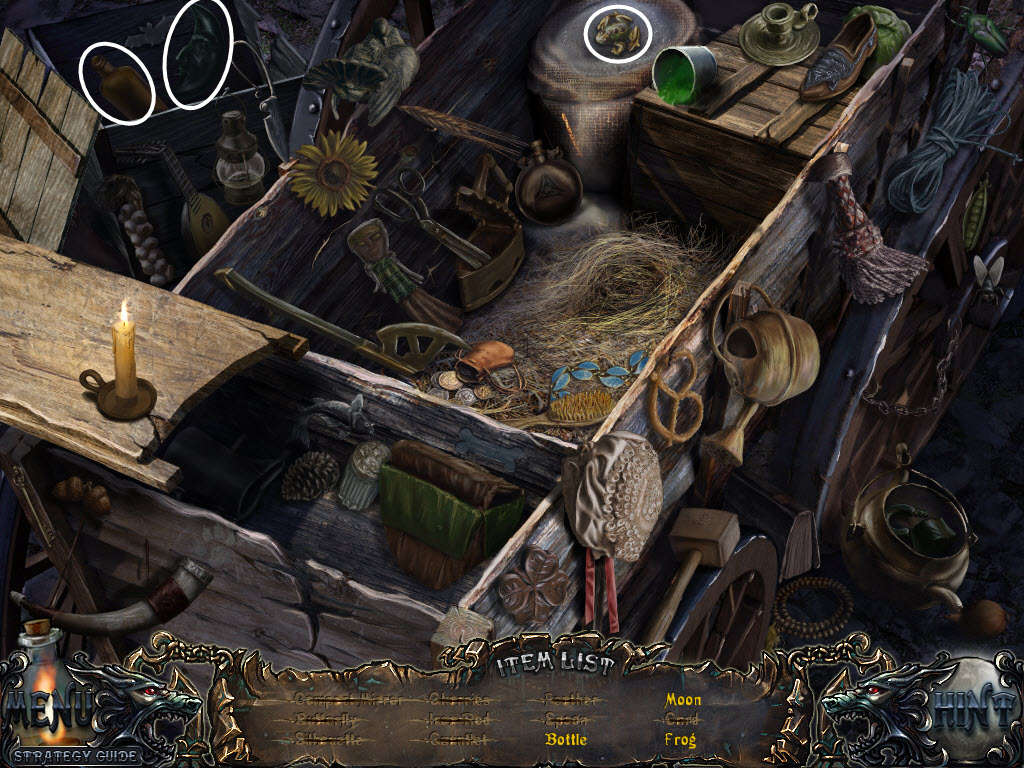
- examine the carriage - hidden object area
- take the Iron Rod
- go down and forward twice
- use the Iron Rod on the boulder
- go left
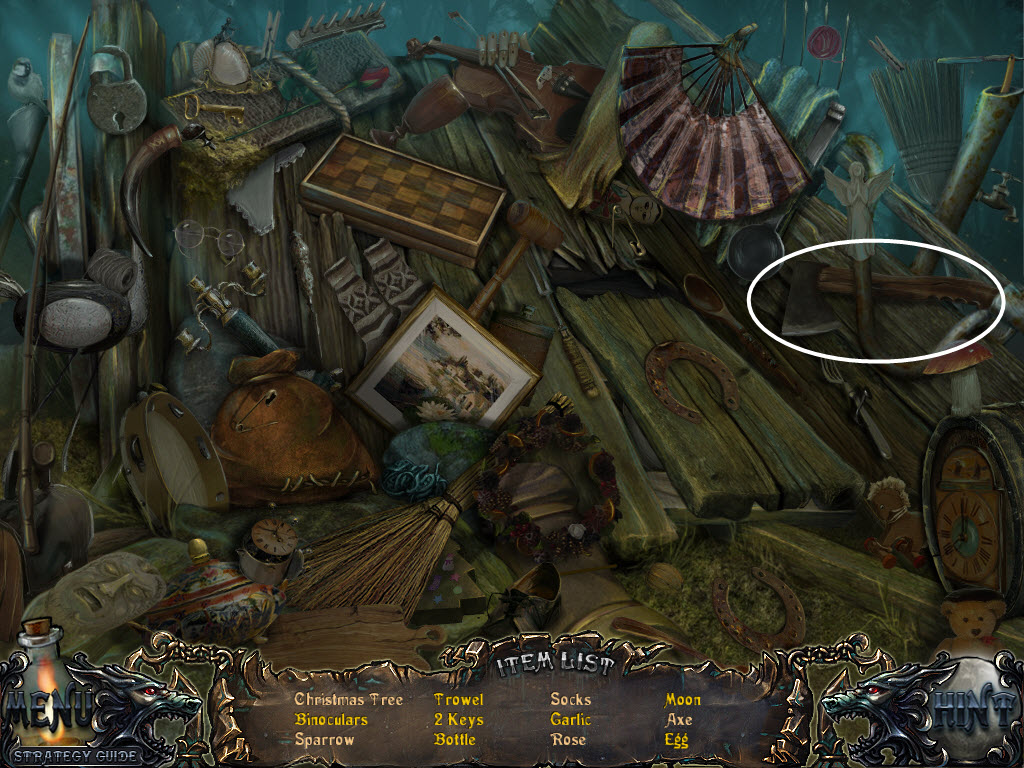
- examine the cart - hidden object area
- take the Axe
- examine the ground by the cave entrance
- use the Spade on the "X" and take the Chest
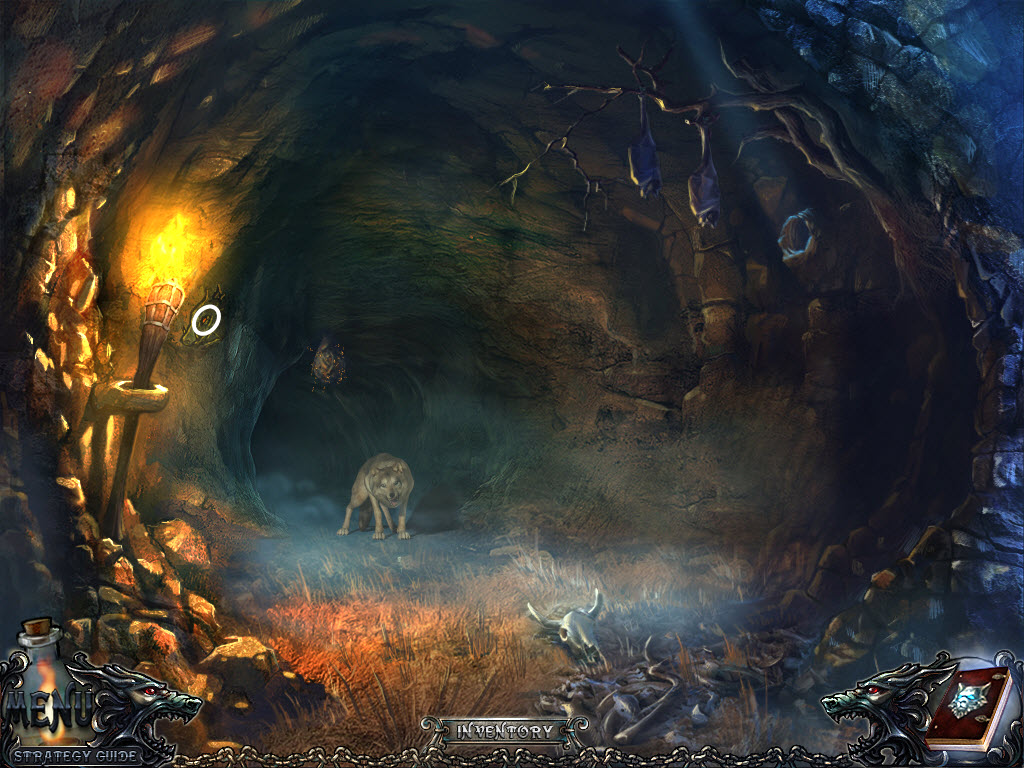
- go left
- use the Flint Stone to light the torch
- examine the drawing of the wolf on the cave wall
- take the Jeweled Eye
- go down and forward
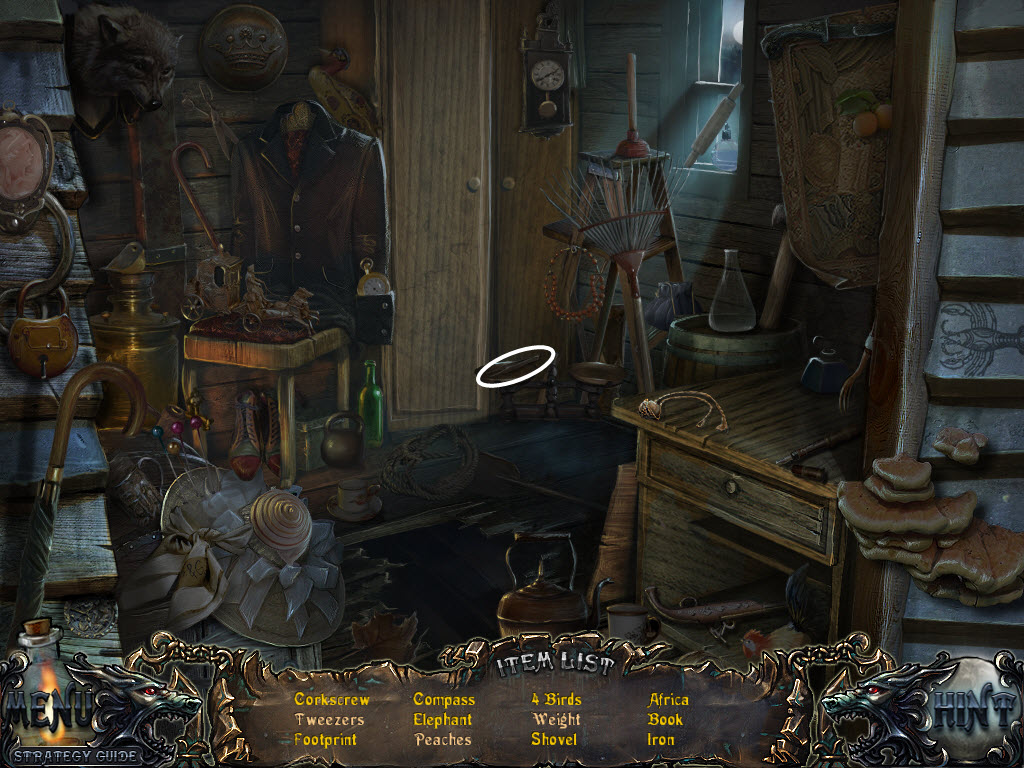
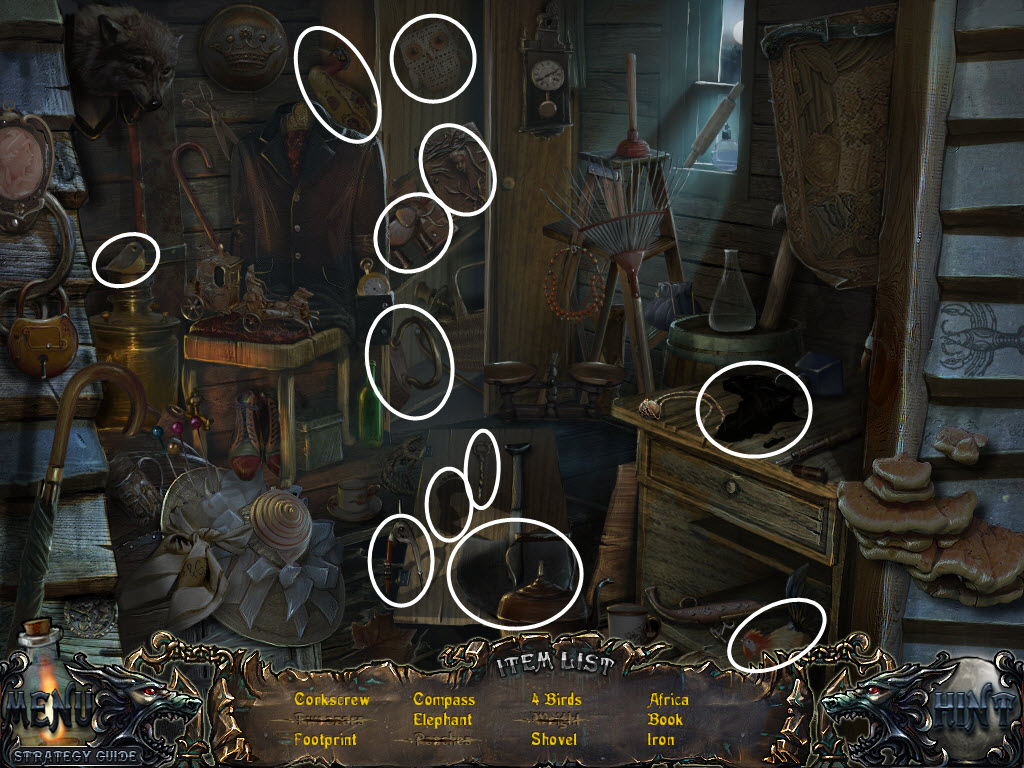
- examine the door - hidden object area
- take the Tweezers
- examine the boarded door
- use the Axe to remove the boards
- go through the door
- remove the cabinet door - oops!
- look inside and take the Puzzle Piece
- examine the boar's head and replace the Jeweled Eye
- take the Puzzle Piece
- go down three times and forward four times (circus tent)
- give the Chest to Madlen
- Card Game
- match the cards
- once you flip two wrong matches they will swap places
- receive Card
- examine the door on the right
- use the Card to open the lock
- go through the door
- click on the girl
- take the Pocket Watch dangling from the tree
- take the Metal Claw in the tree branch
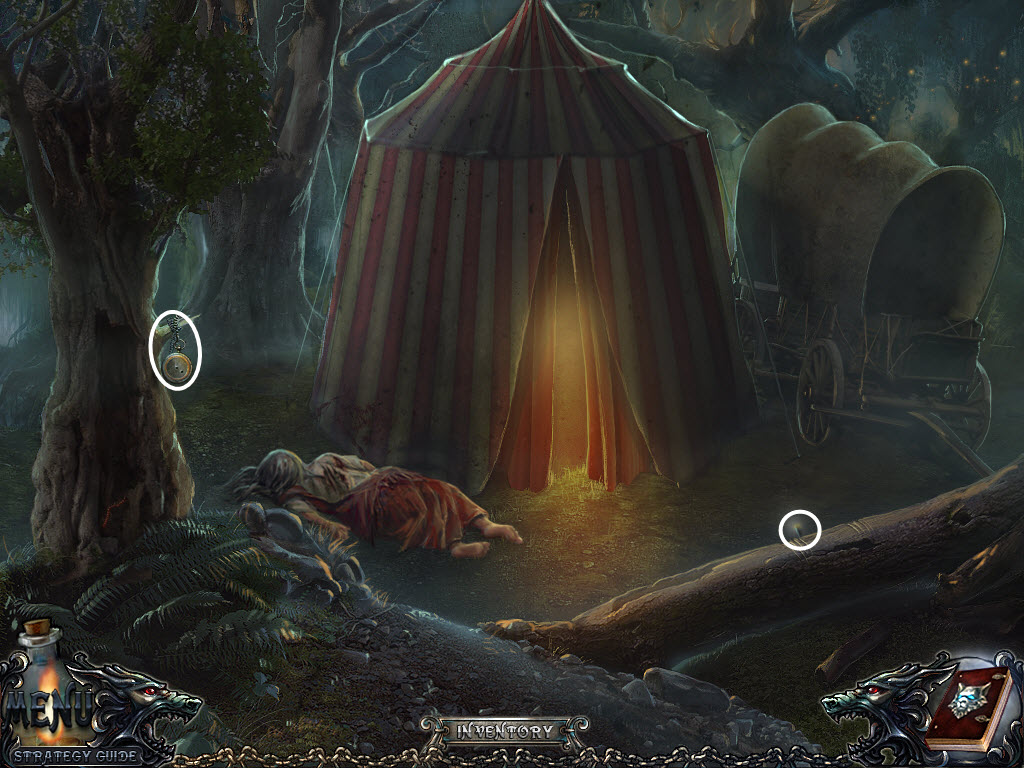
- examine the covered wagon
- use the Metal Claw to cut open the painting
- take the Necklace
- go down seven times and right
- enter the prefect's and go down the steps (lab)
- examine the glass bottles on the back wall
- place the Necklace in the acid
- use the Tweezers to retrieve the Diamond
- examine the board beneath the right window
- replace the Diamond in the glass cutter
- take the Glass Cutter
- go down three times
- examine the window on the right
- use the Glass Cutter on the window
- pull the lever and go through the window
- examine the bucket by the door and take the Puzzle Piece
- open the cupboard doors - hidden object area
- take the H2O2

- examine the middle shelf and take the Mace
- go down and right
- enter the prefect's and go down the stairs (lab)
- examine the glass bottles on the back wall
- place the H2O2, NH4OH, and the Wine Bottle in the green beaker
- take the Explosive
- go down three times, forward twice, and left twice (cave)
- examine the "hole" in the right side of the cave - by the bats
- use the Mace to break the cave wall
- take the Hook
- go down
- examine the cart - hidden object area
- take the Fishing Rod

- go forward
- examine the water at the end of the pier
- use the Fishing Rod to catch a Fish
- examine the cat under the dock and feed it the Fish
- pick up the Puzzle Piece
- examine the door - hidden object area
- take the Slingshot
- go through the door
- remove the bear rug
- examine the lock
- use the Explosive on the lock
- Lock Puzzle
- replace the Puzzle Pieces
- swap the puzzle pieces in each ring then rotate the rings until they form a picture
- take the Cage
- go down twice and left (cave)
- place the Cage on the ground
- use the Slingshot on the beehive
- go forward
- examine the area between the legs of the signposts
- use the Hook to retrieve the Ladder from the hole in the ground
- go forward
- pick up the Metal Wheel and the Metal Parts
- go down six times (tailor's)
- place the Ladder against the right window
- replace the Doorknob and open the door
- go up
- click on the tailor's body
- examine the top of the corner shelf
- change the symbols so they match what was on the tailor's hand
- take the Key
- examine the candle
- take the Puzzle Piece
- go down
- examine the cupboard - hidden object area
- take the Lamp
- examine the small dresser in the left corner
- Tailor Puzzle
- replace the Puzzle Pieces
- swap the tiles until they form a picture
- if the puzzle piece turns gray it is in the correct spot
- take the Clamp Part
- go down once, forward twice, and left three times
- use the Lamp to see inside the hole in the tree
- examine the hole in the tree - hidden object area
- take the Pincers
- go forward
- examine the mechanical figure
- use the Key on the lock and turn it three times
- go through the door
- examine the body of the scientist
- pick up the Blue Glass
- go right
- examine the book on the left
- take the Wrench
- examine the vice
- place the Clamp Part on the vice
- place the Pocket Watch in the vice
- use the Wrench to retrieve the Lock Pick
- examine the bookshelf - hidden object area
- take the Red Glass
- go down eight times and right once
- examine the gate
- Gate Puzzle
- use the Lock Pick on the gate
- swap the locks on the left side so they line up with the locks on the right and fit together
Note: I had trouble getting a screenshot, but the left side does show the correct locks
- go through the gate
- examine the crates in the left corner
- take the Net
- examine the archway - hidden object area
- take the Oil Can
- go down twice, up twice, left three times, up twice and right (scientist's)
- examine the bookshelf - hidden object area
- take the Iron Weight
- examine the trap door
- use the Oil Can on the hinges
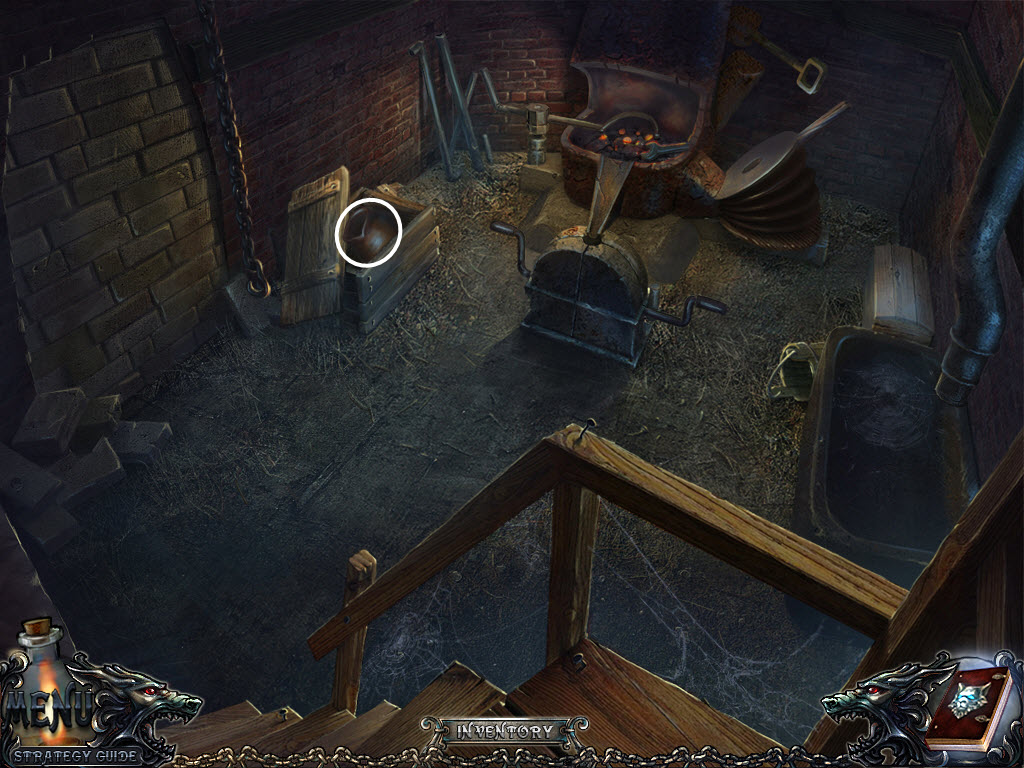
- go through the trap door
- pick up the Crucible
- place the Iron Weight on the hook
- click on the weight and pull it back so it swings and smashes the wall
- take the Broken Sword
- examine the book and take the Sheet Music
- examine the coals
- use the bellows to heat up the coals
- place the Crucible on top of the coals
- place the Metal Parts inside the Crucible
- turn the handle that's attached to the Crucible
- turn the left handle on the mold
- use the Pincers to pick up the Hot Frame
- go down
- examine the water pump and replace the Metal Wheel
- turn the Metal Wheel
- go through the trap door
- place the Hot Frame in the water trough
- take the Window Frame
- go down twice
- place the Sheet Music on the organ
- Organ Puzzle
- click the keys that match the letters on the Sheet Music
- click the back of the organ
- Wolf Puzzle
- the object is to connect all the pieces
- see video for solution
- take the Stained Glass
- examine the left window and replace the Window Frame
- use the Red and Blue Glass on the Window Frame
- examine the right window and replace the Stained Glass
- make a note of where the light shines
- examine the box above the ladder
- Box Puzzle
- place the Broken Sword where the lever is missing
- pull the levers according to where the light beams hit the floor
- solution: left lever = all the way down; right lever = all the way up
- examine the hidden door
- place the Medallion in the door frame
- take the Grappling Hook
- go down seven times, right once and forward
- examine the archway - hidden object area
- take the Steel Rake

- examine the lit window on the left
- use the Grappling Hook on the window
- go through the window
- use the Net to catch the Bird
- examine the bird cage at the back of the room
- place the Bird in the cage and shut the door
- remove the shield from the wall on the right
- Slider Puzzle
- move the pieces around until you can slide out the "key"
- see video for solution
- take the Key
- examine the box revealed by the birdcage
- use the Key on the box and turn it
- take the Puzzle Piece
- go down three times, forward twice, and three left (tree)
- examine the hole in the tree - hidden object area
- take the Pick
- go right
- examine the wall on the right
- use the Pick on the wall and take the Sickle
- examine the gate
- Gate Puzzle
- replace the Puzzle Piece
- use the arrows in the corners to rotate the pieces
- the object is to match the picture in the center
- see video for solution
- go through the gate
- pick up the Bucket
- examine the tree on the right
- use the Steel Rake to remove the leaves
- take the Portrait
- go right
- examine the pile of sand on the right
- use the Bucket on the sand
- examine the area between the house and the swing and you'll discover a shield
- use the Sickle to remove the vines and retrieve the Shield
- go down and forward
- examine the portrait on the left
- tear back the corner and take the Pliers
- pour the Bucket of Sand on the fire and take the Nail
- examine the right door
- place the Shield on the right door
- Door Puzzle
- flip the red circles until all three show the lion
- examine the door - hidden object area
- take the Hammer
- go down
- examine the statue on the right
- use the Pliers to bend the metal pins
- take the Portrait
- go right
- examine the swing set
- use the Nail on the right side to fix the swing set
- use the Hammer on the nail
- click on the swing and pull it back so it hits the ladder
- go through the window
- examine the bedside table
- Bedroom Puzzle
- move the yellow strings so the light passes through all the blue ones
- see video for solution
- take the Portrait
- go down twice and forward
- examine the wall with the portraits
- replace all the Portraits
- take the Shield
- examine the door on the left
- place the Shield on the door
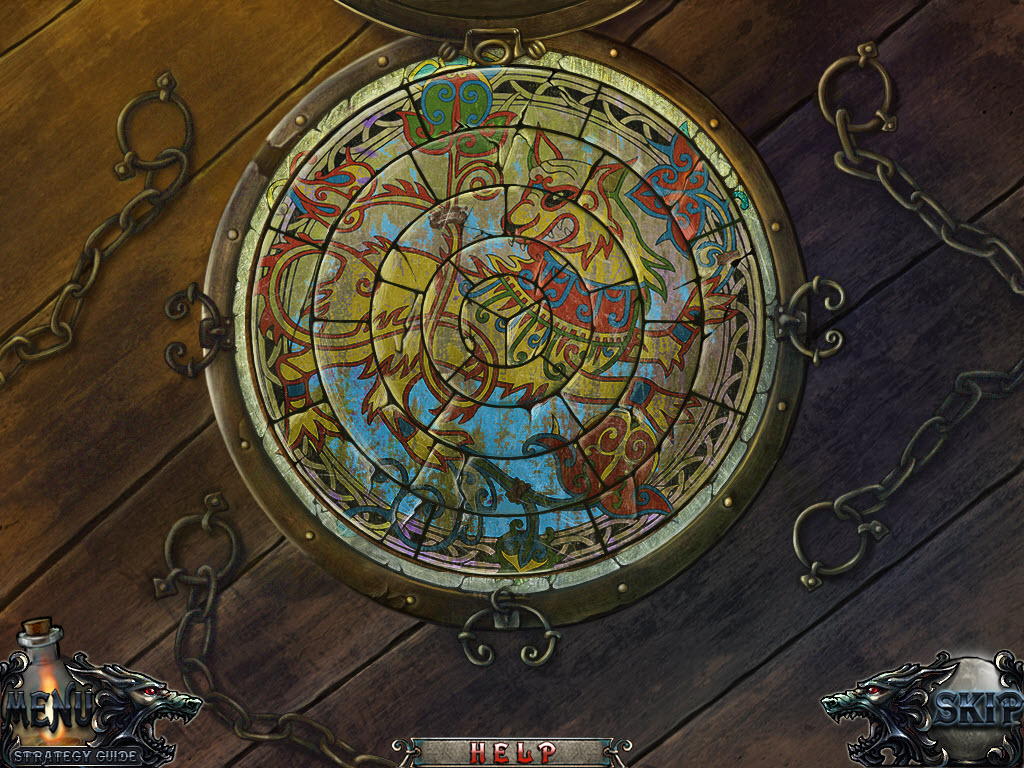
- Door Puzzle
- rotate the inner/outer rings to form the picture of a wolf face
- go through the door
- examine the bookshelf - hidden object area
- take the Statuette (Note: this item is not actually listed in the scene for you to find)
- go down twice, right, and through the window (bedroom)
- examine the dresser
- place the Statuette on the dresser
- take the Cord
- place the Cord on the bell beside the bed
- pull the Cord
- open the box and take the Telescope
- place the Telescope on the stand by the window
- Telescope Puzzle
- move the lens's around until you see a set of numbers
- solution: upper left, lower right, upper right, lower left
- make a note of the number
- go down twice and forward
- examine the right door - hidden object area
- take the Glue
- go left
- examine the globe
- input the numbers you saw in the telescope
- take the Rail and read the diary excerpt
- examine the bookshelf - hidden object area
- take the Glove
- examine the broken railing - on the floor to the right of the ladder
- replace the Rail
- move the ladder and click the red book
- look inside the secret door
- pick up the Wheel
- go down three times
- talk to Gerard
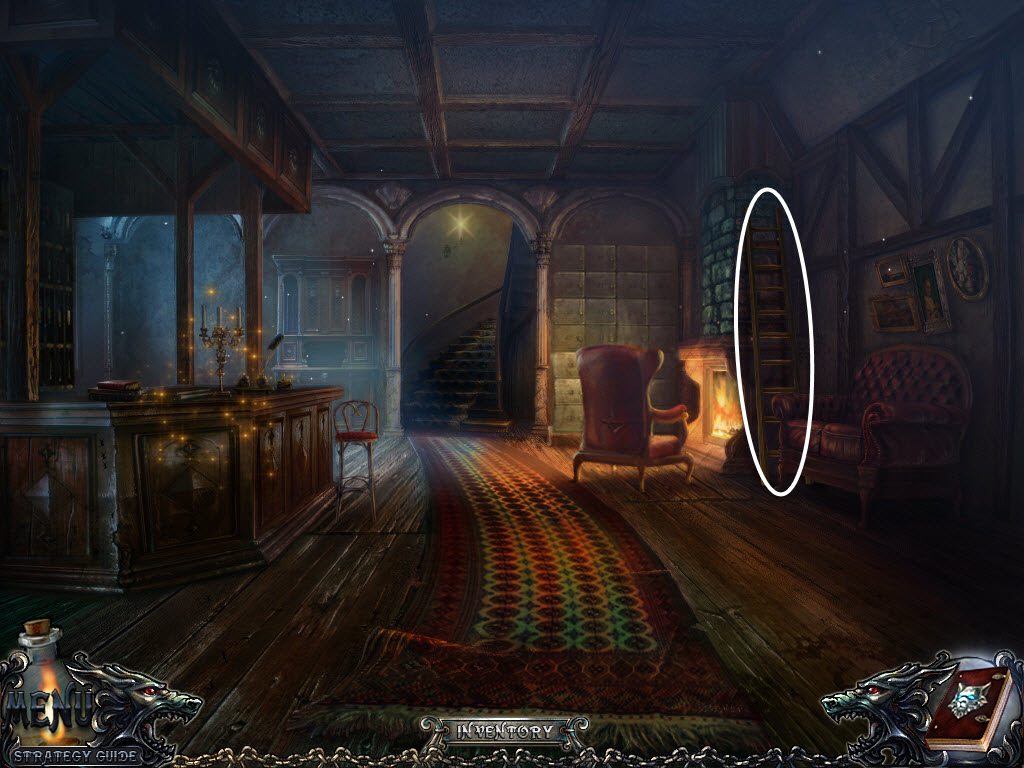
- enter the hotel
- pick up the Ladder
- examine the front desk - hidden object area
- take the Sponge
- go up the stairs
- talk to Madlen
- examine the sink
- place the Sponge in the soapy water and then use it clean the mirror
- make a note of what you see in the mirror
- place the ladder against the shelves to reach the Oil
- go down
- examine wall behind the chair
- use the Oil to move the chest
- examine locker #42
- Locker Puzzle
- move the outer circle to 48 and the inner circle to 24
- take the Clothes Bag
- examine the front desk - hidden object area
- take the Handle
- go upstairs
- examine the crate on the left
- place the Glue and Handle on top of the crate
- use the Glue to attach the Handle to the File
- give the Clothes Bag to Madlen
- receive Pillowcase Rope
- examine the window and use the File on the bars
- use the Pillowcase Rope to escape out the window
- go forward twice, left once, and forward
- examine the dock and replace the Wheel
- turn the Wheel
- examine the ground - hidden object area
- take the Rock
- go forward
- throw the Rock at the bird
- pick up the Screw
- examine the jugs
- use the Glove to remove the poison ivy
- take the Clippers
- examine the shed door - not the main door
- place the Screw in the latch and slide open the latch
- look inside the shed - hidden object area
- take the Awl

- go down
- examine the door
- use the Awl on the lock
- pull out the rug from under the door and take the Key
- use the Key to open the lock
- go inside
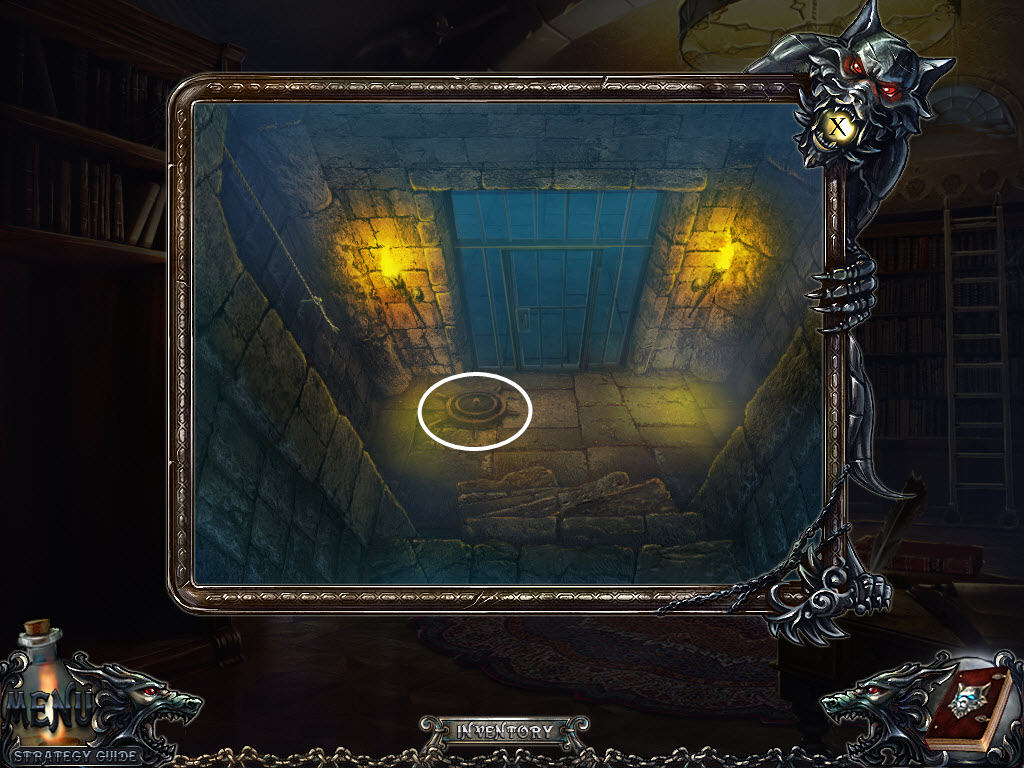
- examine the mechanism on the back wall
- Arrow Puzzle
- drag the arrow around the puzzle to release it
- see video for solution
- receive Arrow Button
- examine the arrow button to the right
- replace the Arrow Button
- press the up arrow
- examine the cage and use the Clippers to free Louise
- examine the cage and take the Magnet
- go down
- examine the ground - hidden object area
- take the Puzzle Piece
- go forward
- examine the hole in the ground by the stables
- use the Magnet to retrieve the Spike
- examine the shed - hidden object area
- take the Whip
- go down
- examine the upper window
- use the Whip to retrieve the Mallet
- go into the hut
- examine the locked box
- use the Spike and Mallet to break the lock
- take the Puzzle Piece
- go down and forward
- examine the stable doors
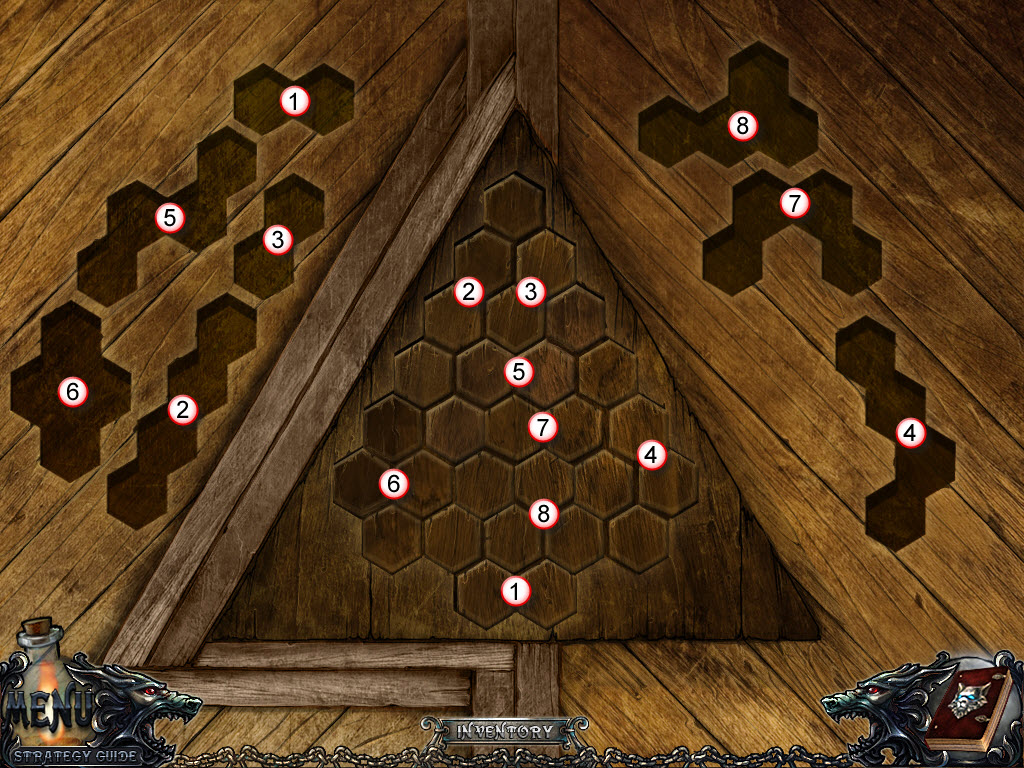
- Stable Door Puzzle
- replace the Puzzle Pieces
- the object is to fit all the pieces into the puzzle
- see screenshot for solution
- enter the stables
The End...?
Content(s) of this game guide may not be copied or
published on any other site without permission from Casual Game Guides.
©CasualGameGuides.com 2006 - 2021